Getting started with Kaseya MDR as a RocketCyber user
This article helps existing RocketCyber users set up or link access to Kaseya MDR by using the built-in synchronization flow (referred to as “migration” in some product interfaces). You will choose the path that matches your starting point, complete the steps, and verify that your RocketCyber tenant data is available in Kaseya MDR.
If you use RocketCyber and want to move to Kaseya MDR (or Kaseya SIEM), there are two ways to establish access depending on where you are starting. This article focuses on the Kaseya MDR experience.
It covers:
-
How access is established from RocketCyber
-
What occurs during the synchronization process
-
What administrators should verify after access is enabled
If you are activating Kaseya MDR and may link it to SaaS Alerts or Kaseya SIEM, see Getting started with Kaseya MDR as a SaaS Alerts, Kaseya SIEM, or MDR-only user.
If Kaseya MDR is included in a Kaseya 365 subscription, see Kaseya 365 Endpoint Pro: Getting started with Kaseya MDR.
Kaseya MDR runs alongside RocketCyber during the synchronization period. Organizations, users, and agents are synchronized so you can confirm access and begin using the new experience without rebuilding your environment or disrupting existing security operations.
Synchronization does not imply a forced cutover or replacement of your existing environment. RocketCyber continues to operate independently during this period.
Each platform is accessed independently using separate sign‑in sessions, even though the same underlying user identity is used.
Before you begin
Make sure you have the following, regardless of which path you take:
-
Owner-level access to your RocketCyber tenant. The migration option (referred to as synchronization in this article) is available only to the Owner of the RocketCyber account.
-
Access to the email address you use for your account. You will receive setup and notification emails during the process.
Choose your starting path
You can establish access in one of two ways, depending on where you are starting:
-
Path A (Start in RocketCyber): You use RocketCyber today and want to move into Kaseya MDR but do not yet have a Kaseya MDR account.
-
Path B (Start in Kaseya MDR): You already have a Kaseya MDR account and want to bring your existing RocketCyber tenant data into that account.
How synchronization works
When you establish access from RocketCyber, the system evaluates your user identity and organization to determine how to associate your account with Kaseya MDR.
Because multiple environments may already exist (for example, RocketCyber, SaaS Alerts, or Kaseya MDR), the platform does not assume which environment to use. Instead, it validates identity and organization associations to ensure accounts are linked correctly and to prevent unintended cross‑tenant access.
During this process:
-
If a matching tenant or organization is found, your account is linked to that existing environment
-
If no match is found, a new tenant and associated user account are created
-
If your email address is not associated with an existing organization, a new organization is created
This process establishes identity and organization relationships only. It does not imply that all integrations, data ingestion, or monitoring configurations are fully active immediately.
In most cases, RocketCyber configuration, users, agents, and integrations are synchronized automatically. However, some integrations, most commonly Microsoft, may require reconnection due to updated permissions.
Agents do not need to be reinstalled.
RocketCyber and Kaseya MDR continue to operate independently after access is established and are accessed through separate sign‑in sessions.
Path A: Start in RocketCyber (no Kaseya MDR account yet)
Use this path if you’re a current RocketCyber customer and Kaseya MDR is not yet set up.
Sign in to RocketCyber as the Owner
Open RocketCyber and sign in using the Owner account for the tenant.
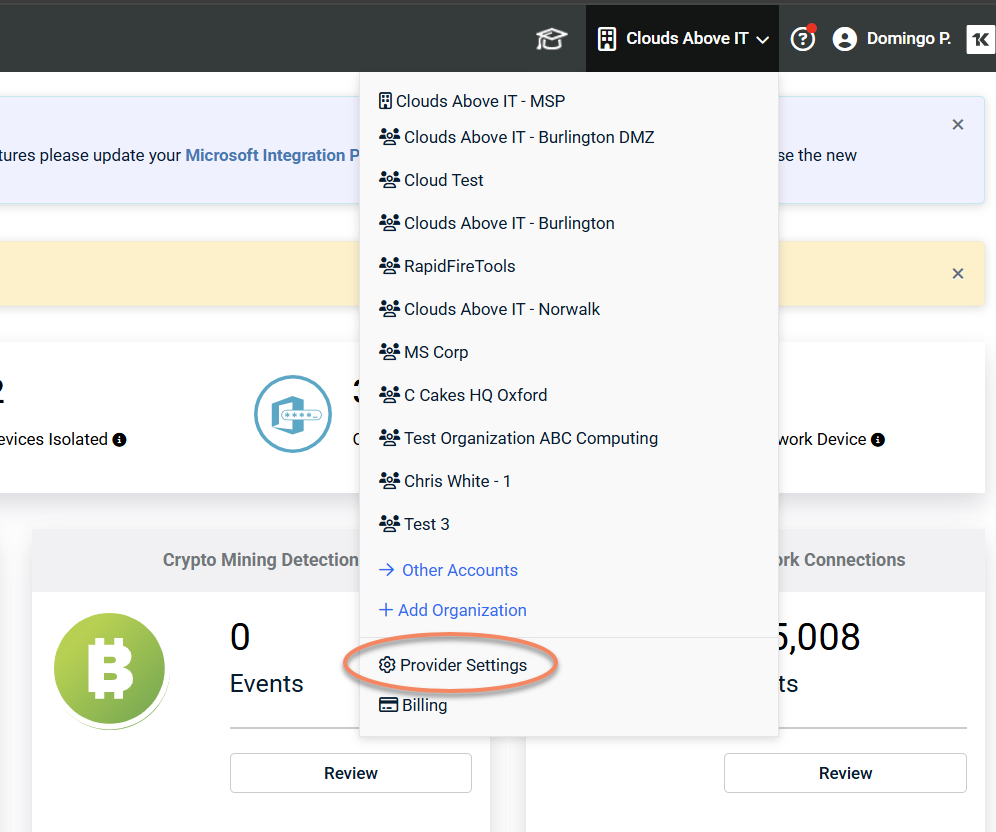
Open Provider Settings
From the organization selector, choose Provider Settings.
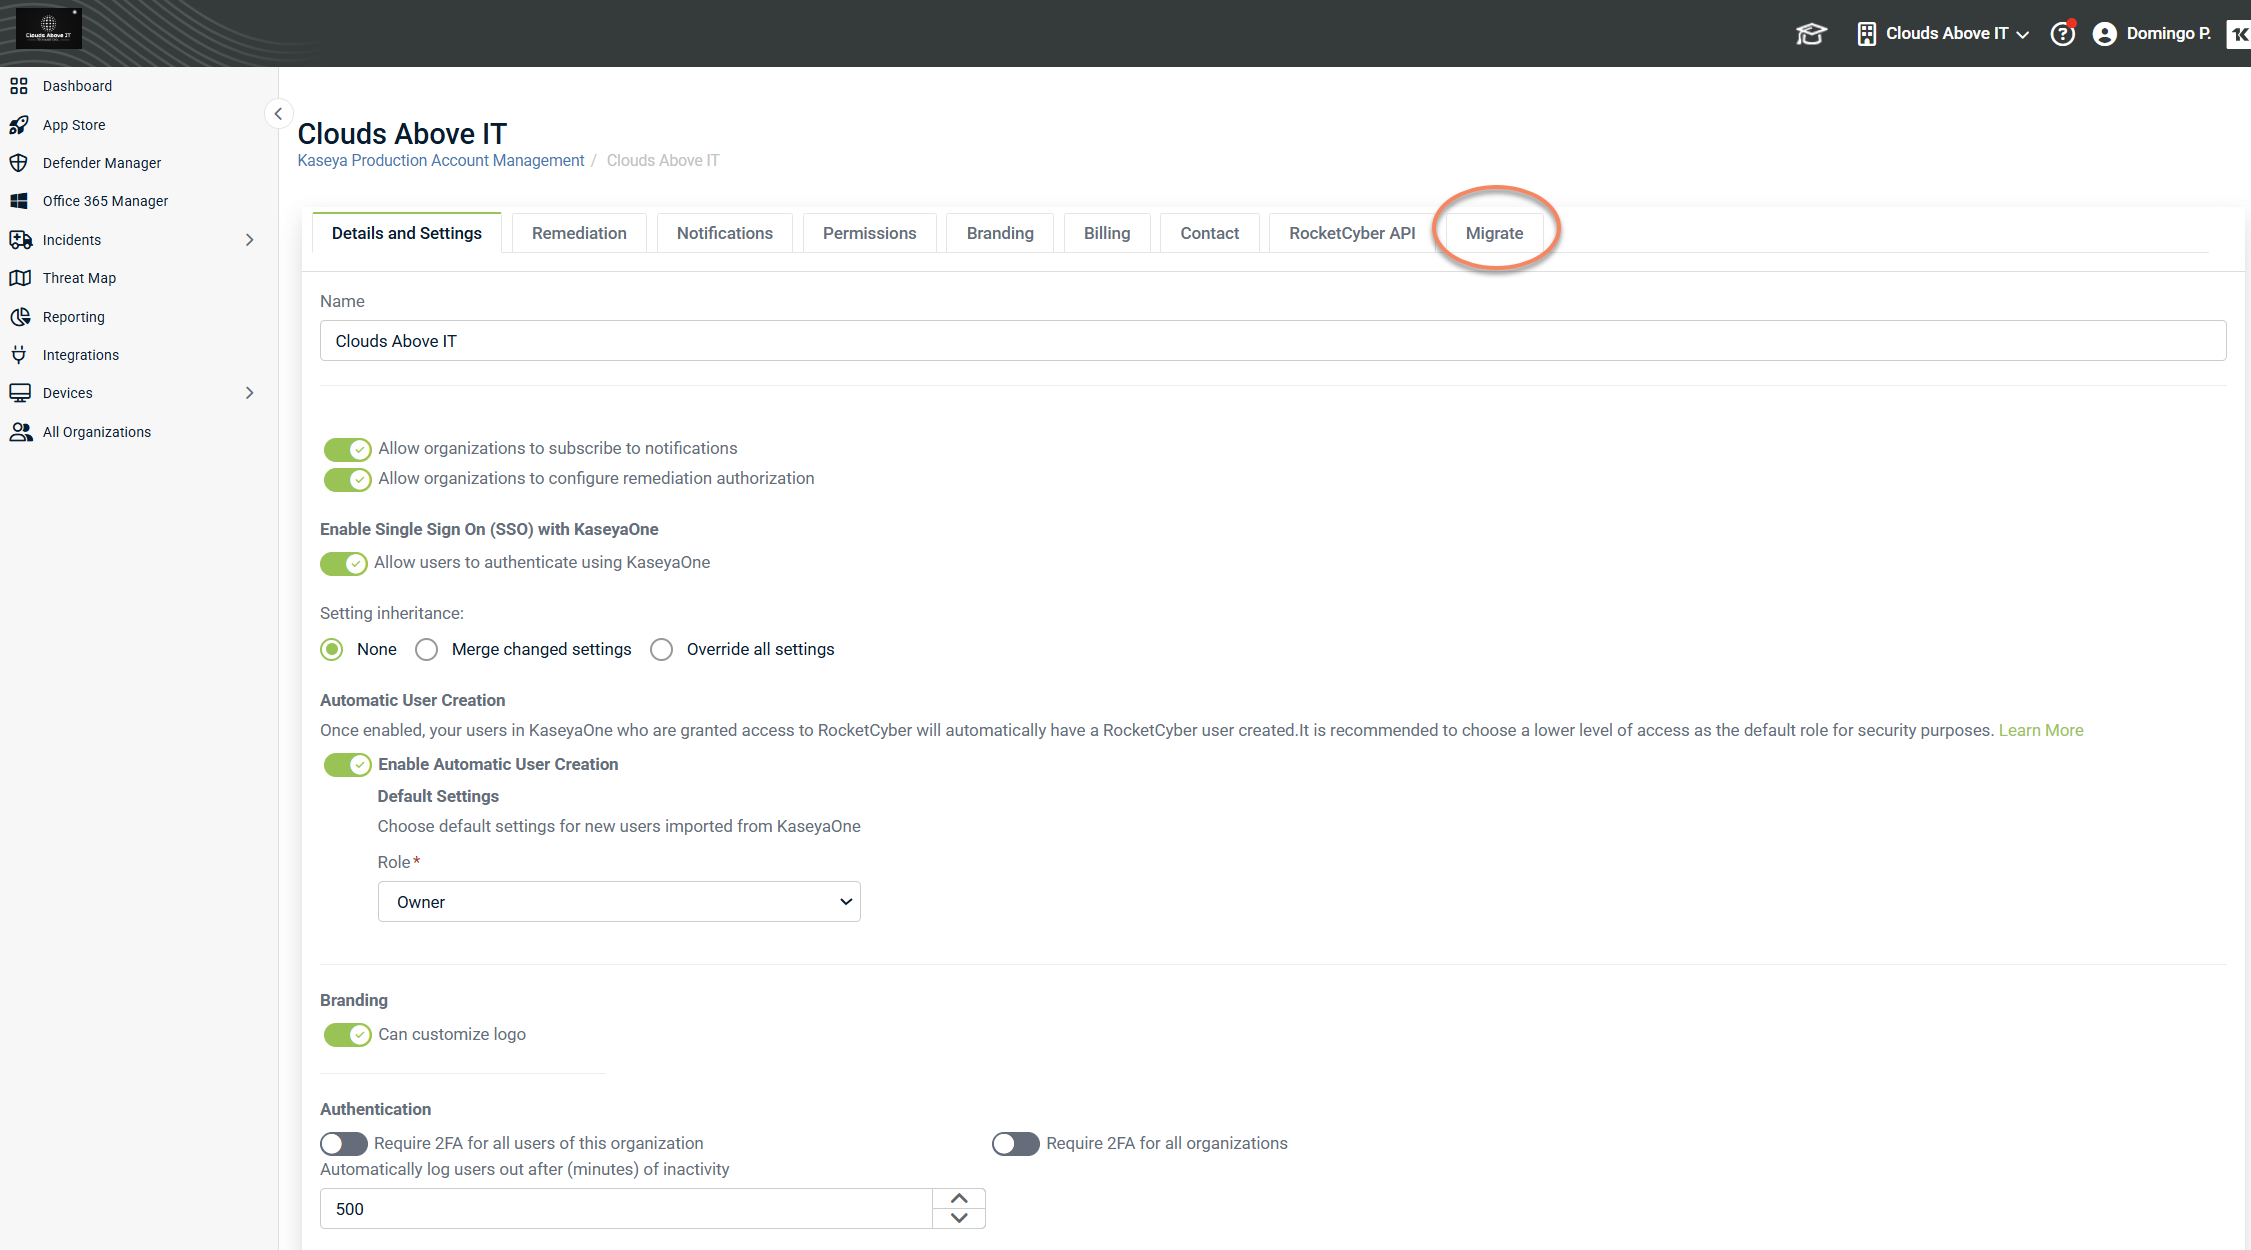
Go to the Migrate tab
In Provider Settings, select the Migrate tab.
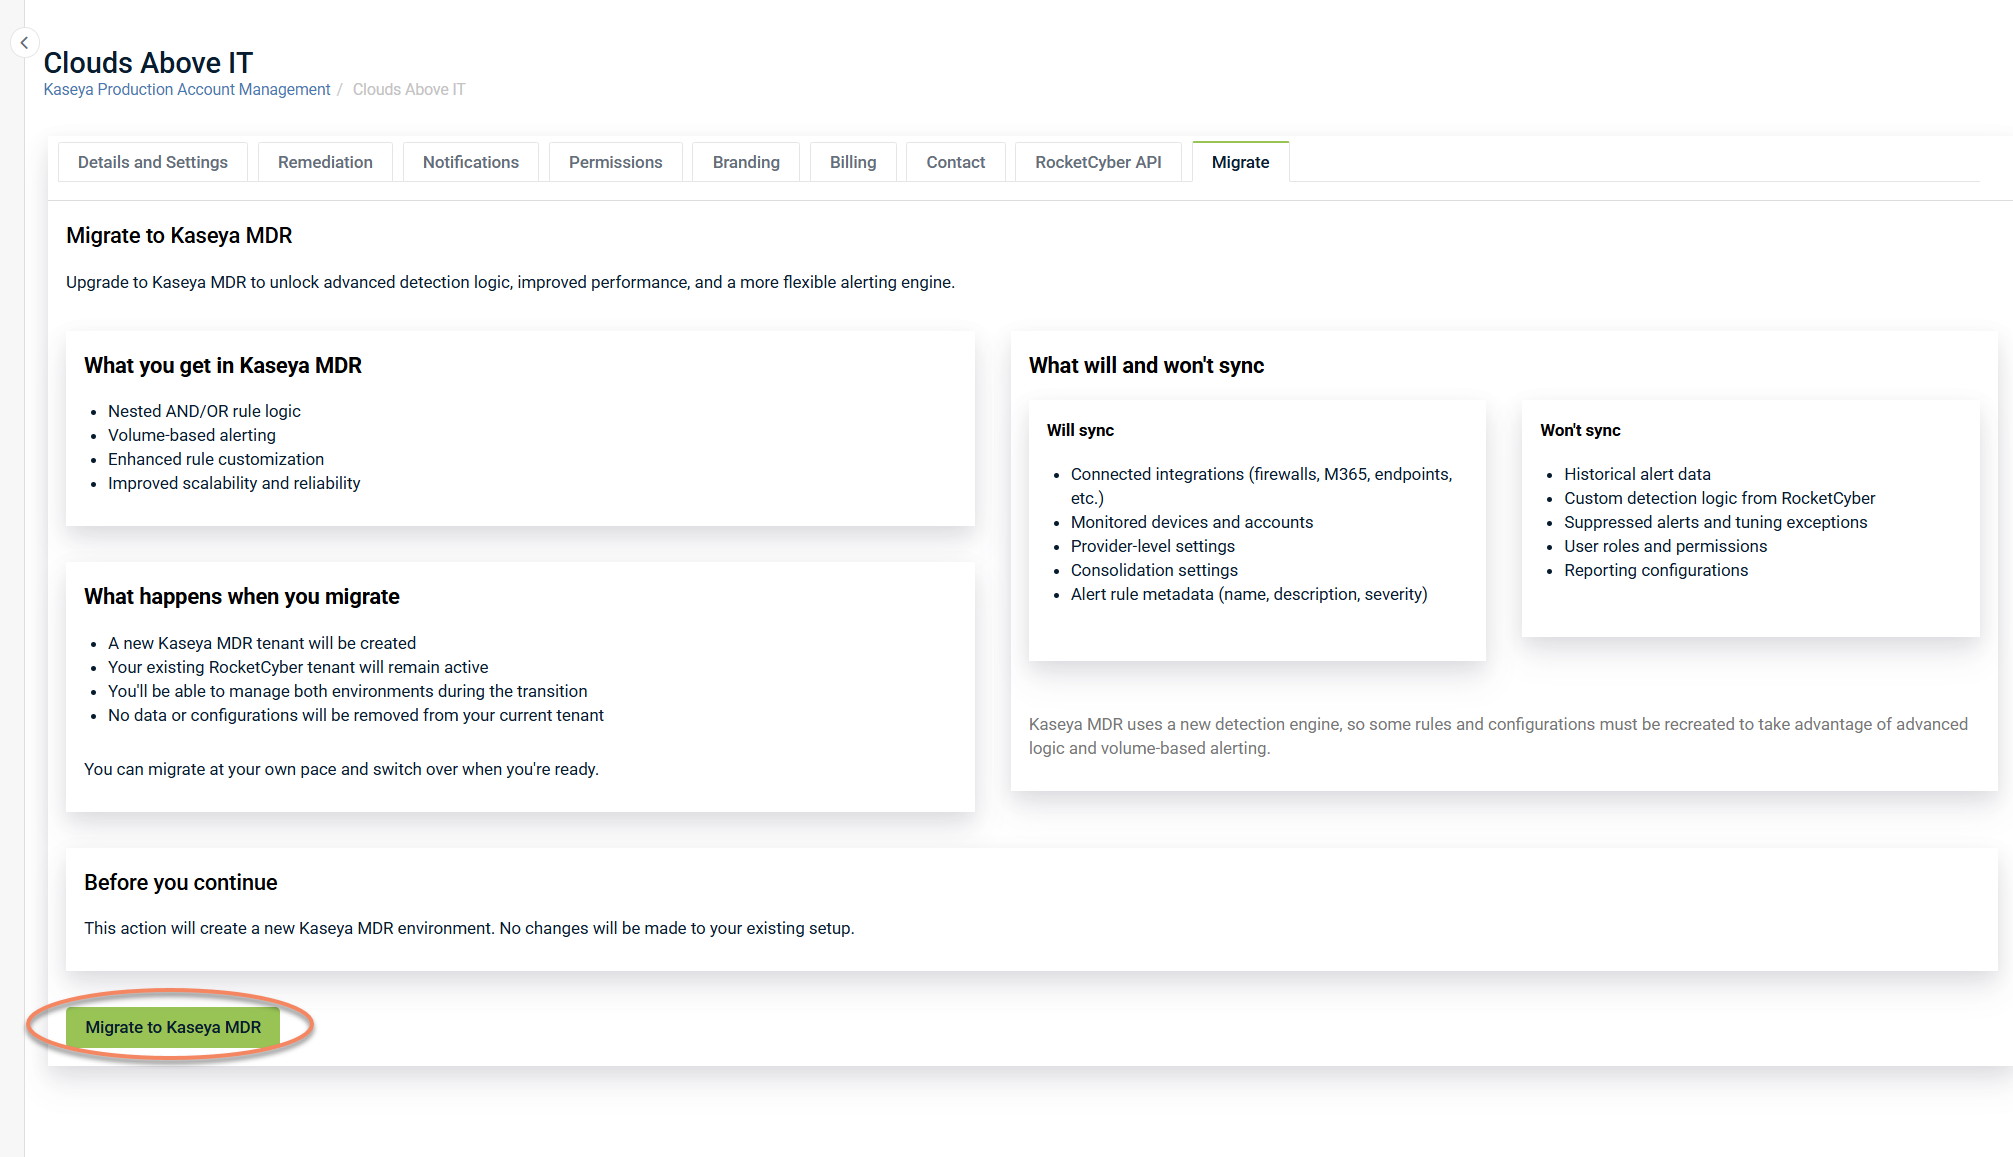
Review migration details
The Migrate page shows what will be included as part of the process, including what will and will not be synchronized. Review this information before continuing.

Start the synchronization
Select Migrate to Kaseya MDR.
If prompted, leave the Kaseya MDR API key field blank. Because you do not yet have a Kaseya MDR account, the system creates a new environment as part of the synchronization process.
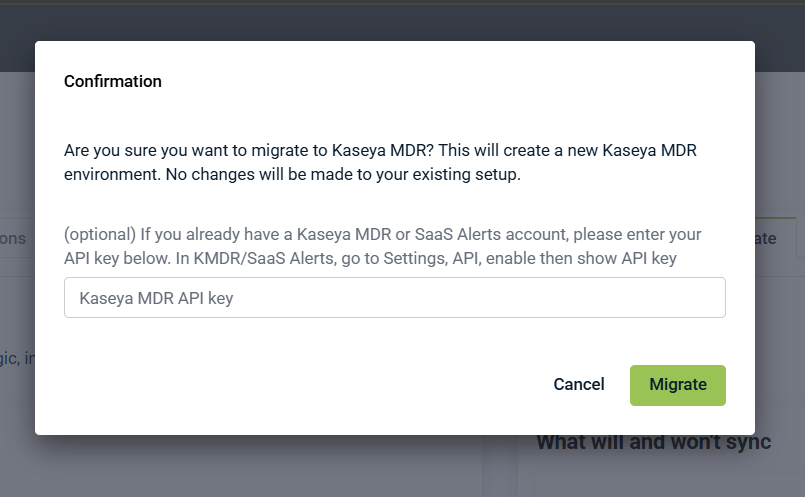
Confirm the action
When prompted, confirm that you want to proceed. The confirmation message indicates that a new Kaseya MDR environment will be created and that no changes will be made to your existing RocketCyber setup.
Use the welcome email to finish setup
You will receive a welcome email from Kaseya with a link to your new account. Select the link and complete sign-in setup.
If you do not receive the email, check the RocketCyber interface for any visible error notifications and confirm that the process completed successfully.
Supported sign-in methods include:
-
Email and password
-
Google
-
Microsoft
Sign in to Kaseya MDR
Sign in with the credentials you just set up. Your RocketCyber data becomes available in Kaseya MDR as the process completes in the background.
Confirm data arrived
After signing in, complete the verification checklist below.
Path B: Start in Kaseya MDR (you already have a Kaseya account)
Use this path if you already have a Kaseya MDR account and want to bring your RocketCyber tenant data into it.
Sign in to Kaseya MDR
Sign in with your existing credentials. After sign-in, you will be asked whether you already use RocketCyber.
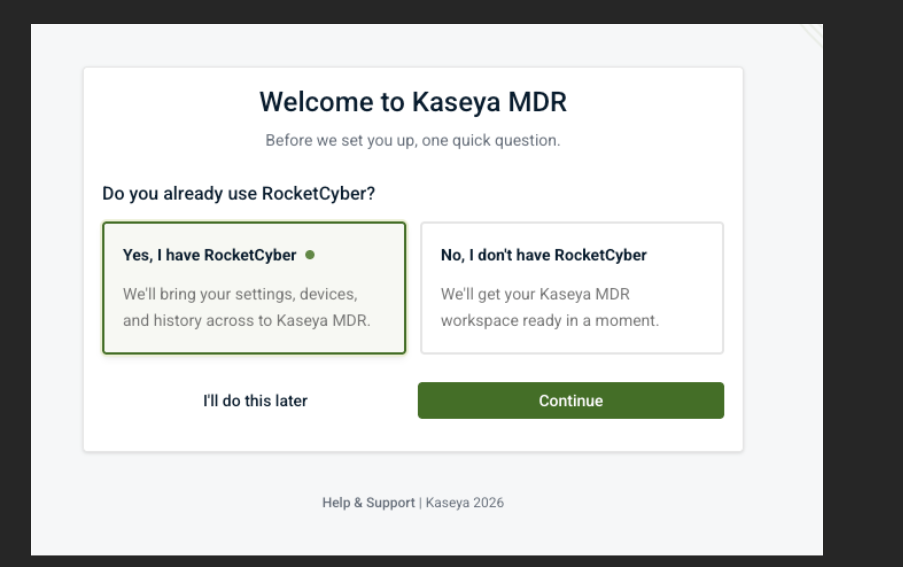
Choose Yes, I have RocketCyber and continue.
If you choose I’ll do this later, you will be prompted again the next time you sign in, and a reminder also appears when you create a new organization.
Copy your migration key
Kaseya MDR displays the One last step: finish in RocketCyber page with a migration API key. Copy the key (select the field or use the copy icon).
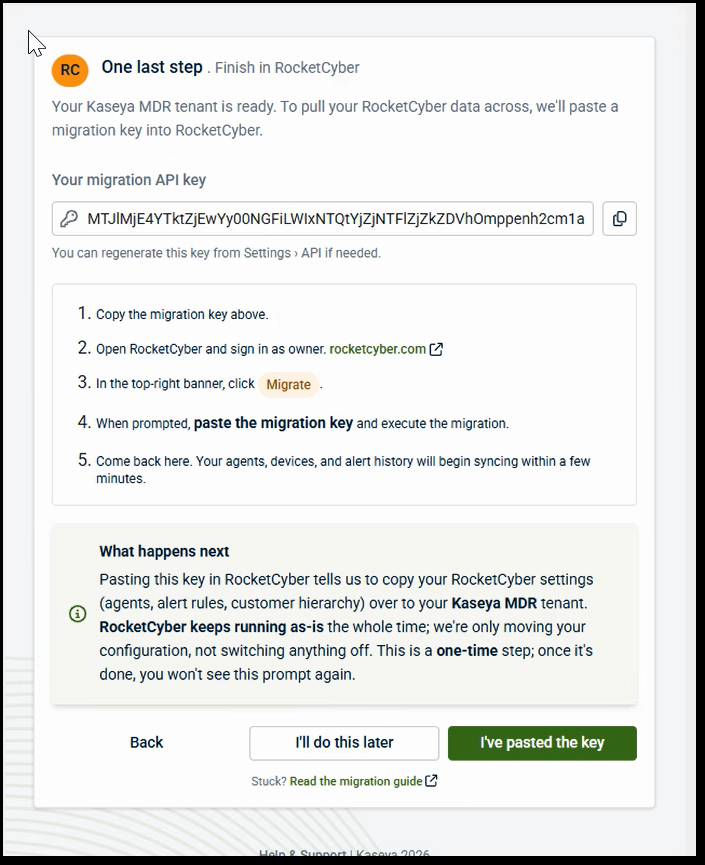
If needed, you can regenerate it under Settings > API.
Sign in to RocketCyber as the Owner (in a new tab/window)
Open RocketCyber and sign in using the Owner account.
Start the synchronization in RocketCyber
In RocketCyber, follow the same steps described in Path A to open the Migrate page:
-
Open Provider Settings
-
Select the Migrate tab
Paste the key and confirm
Paste the migration key from Kaseya MDR and confirm to start the process.
RocketCyber continues running as normal during this process.
Return to Kaseya MDR and confirm
Go back to the Kaseya MDR tab and select I’ve pasted the key.
-
If the process is complete, you see a confirmation screen and can continue
-
If the process is still running, wait briefly and select the option again
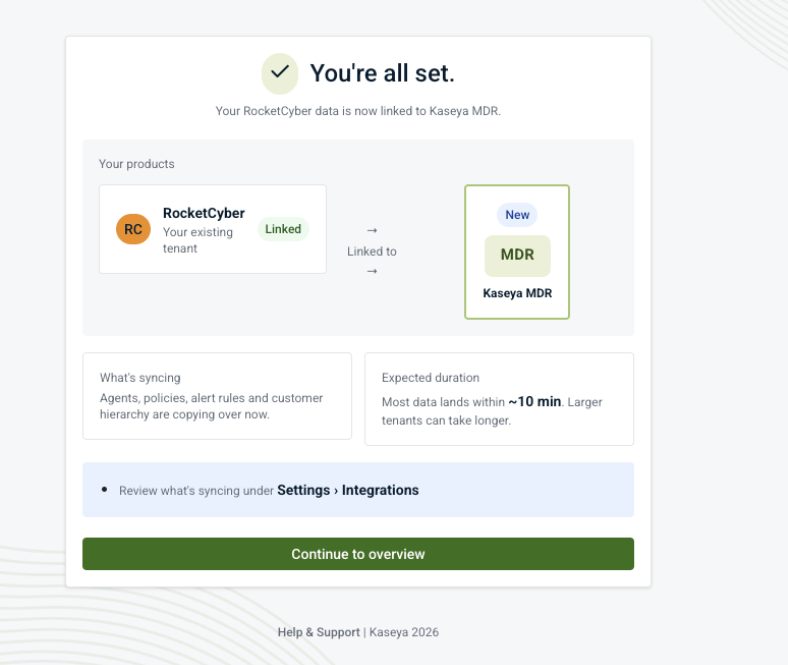
What is synchronized
The process brings the following from your RocketCyber tenant into Kaseya MDR:
-
Customer accounts (the organizations you monitor)
-
Users (your MSP team members)
-
Integrations (configured product connectors)
-
Logic rules (alert rules and detection logic)
Each part is copied in sequence.
After synchronization: verification checklist
After completing the process and signing in to Kaseya MDR, verify that your RocketCyber data is available and correctly associated with your account.
-
Check organizations: Open Organizations in Kaseya MDR and confirm your RocketCyber customer accounts are listed. If expected organizations are missing or duplicated, confirm that the correct account or tenant was used during synchronization.
-
Review integrations: Open Settings > Integrations and confirm that expected integrations are present. Some integrations may require a one-time reconnection due to updated permissions.
-
Confirm detection/alert rules: Open the detection rules area and verify your existing rules are present.
Troubleshooting and FAQs
I don’t see a migration option inside RocketCyber.
You are most likely signed in as an Admin rather than the Owner. Sign out and sign back in as the Owner account. If you do not have Owner credentials, contact your RocketCyber account contact.
I picked "I’ll do this later" by mistake (Path B). How do I get back?
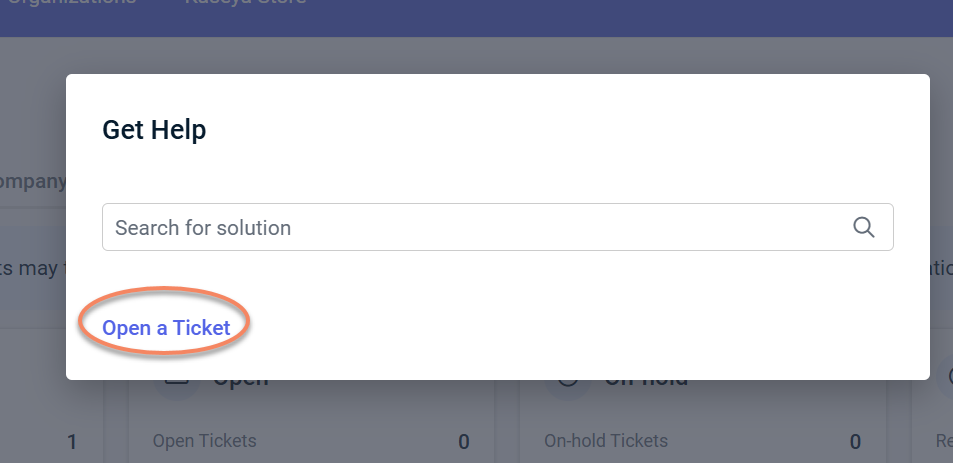
You will be prompted again on your next sign-in, and a reminder also appears when you create a new organization. If the prompt does not appear, create a support ticket through:
-
The KaseyaOne (K1) portal (Support > Get Help > Open a Ticket), or

-
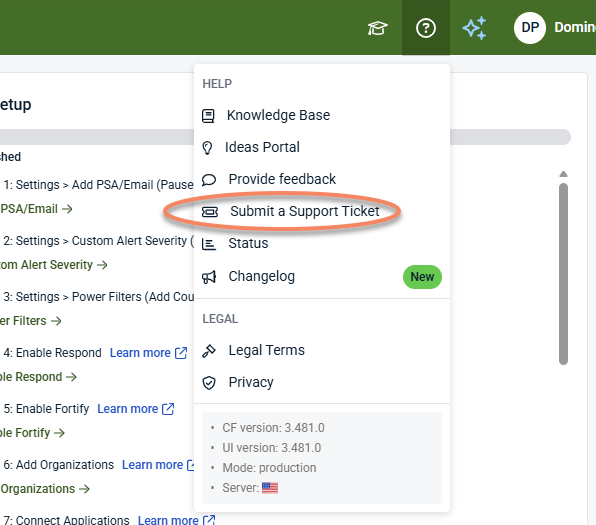
The product UI (Help > Submit a Support Ticket).
My migration key isn’t working (Path B).
Regenerate a new key in Kaseya MDR under Settings > API, then copy and paste it into RocketCyber again.
Kaseya says it’s still migrating after I clicked "I’ve pasted the key" (Path B).
Migration can take a few minutes. Wait briefly, then click I’ve pasted the key again. If you do not see progress after several attempts, create a support ticket through:
-
The KaseyaOne (K1) portal (Support > Get Help > Open a Ticket), or
-
The product UI (Help > Submit a Support Ticket).
Related articles
-
Synchronization and parallel operation FAQ: Explains how Kaseya MDR runs alongside RocketCyber, what carries over, and what does not change during the transition
-
Introducing Kaseya MDR: Provides orientation on what Kaseya MDR is, how it relates to RocketCyber, and how it fits within the broader security platform
-
How RocketCyber features map to Kaseya MDR: Helps you locate familiar RocketCyber capabilities in the Kaseya MDR interface and understand what moved or changed
-
Managing organizations: Explains how organizations are represented, scoped, and managed once access is confirmed
-
Getting started with Kaseya MDR: Describes how this article fits within the overall Getting started structure and where to go next based on your access path


