Using the Respond Module
The Respond module is where you define how Kaseya MDR escalates detected activity into alerts, approvals, or automated response actions.
Respond does not replace detection or investigation. Instead, it sits after alerts and investigations and allows you to decide:
-
When activity should generate an alert only
-
When human approval is required before taking action
-
When response actions should run automatically
Automated response actions are intended to reduce immediate risk (for example, isolating access or limiting impact) while investigation continues. They do not perform root‑cause analysis, forensic investigation, or long‑term remediation.
This article shows how to use the Respond module in the UI, where to click to get started, and how the main Respond screens fit together before you create your first Respond rule.
Respond in Kaseya MDR controls response decisions and actions within the MDR experience. If your organization also uses SaaS Alerts or Kaseya SIEM, those products continue to manage their own integrations, detection workflows, and response automation.
If the same underlying activity is evaluated by multiple products, similar alerts may appear in more than one place. Respond rules in Kaseya MDR are part of a shared rule model across Kaseya security products. The same rule may appear across multiple product surfaces, and editing or disabling a rule in one product updates it across all products where it is available.
However, while rule configuration is shared, rule execution and alerting behavior occur within the context of each product and depend on available data, integrations, and configuration.
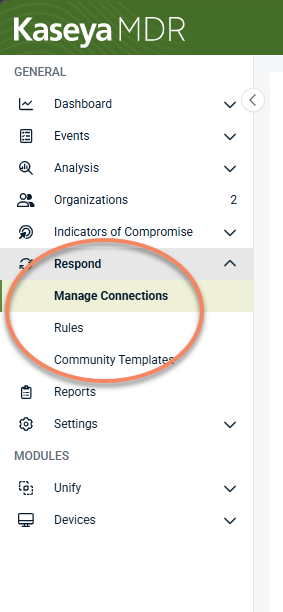
Accessing the Respond module
To open the Respond module:
-
In the side navigation menu, select Respond.
-
Expand the Respond section.
You will see the following areas:
-
Manage Connections: Connect organizations so response actions can run
-
Rules: Create, view, and manage Respond rules
-
Community Templates: Review and duplicate prebuilt Respond rule templates
If Respond has not been enabled yet, you will see an option to turn it on.
Turning Respond on
If Respond is not enabled:
-
Review the information shown, select the checkboxes, and click Turn On Respond.
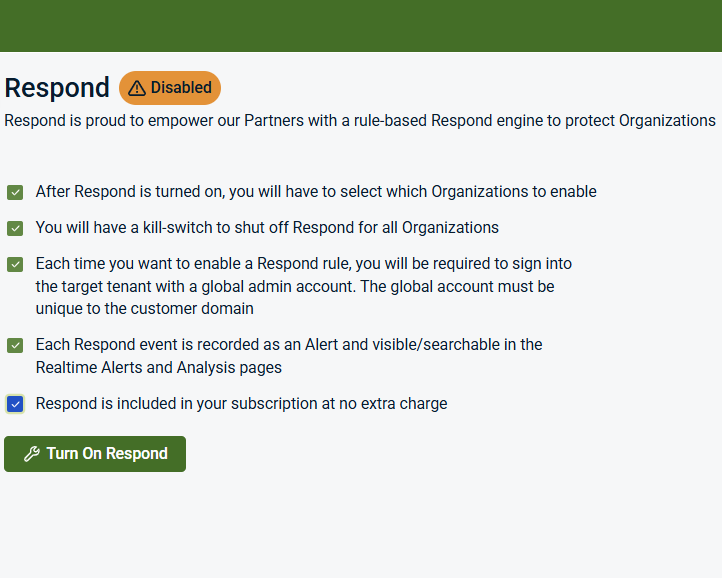
-
You will see a success confirmation message in the upper-right corner.
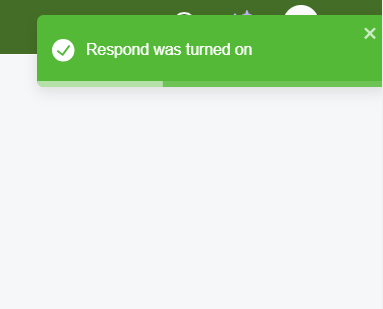
After Respond is turned on:
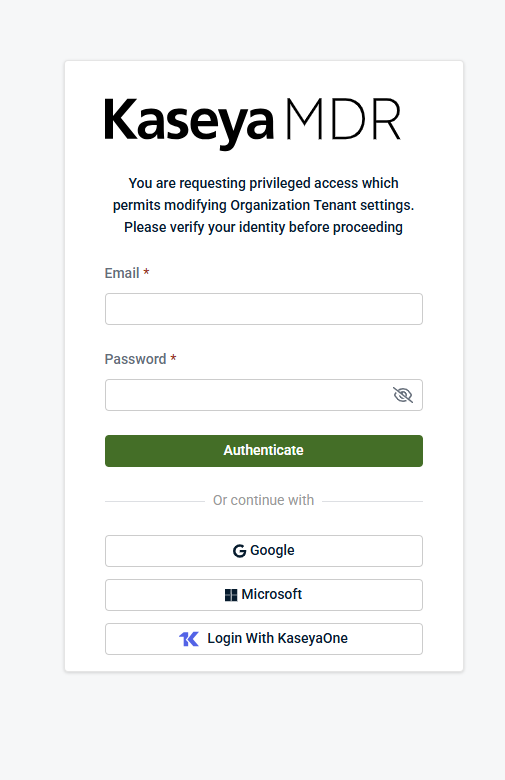
-
You will be prompted to authenticate
-
The Respond module becomes available in the navigation
-
You can begin creating Respond rules
-
A global option is available to turn Respond off if needed
Turning Respond on does not automatically execute response actions. It enables the module so you can define rules and decide how responses should occur.
Manage Connections
When you open Respond, the first view you see is Manage Connections. This page shows whether organizations are ready to execute Respond actions and is the starting point for enabling response execution.
Respond connections are separate from detection. Respond rules can still evaluate events and generate alerts when a Respond connection is not active, but response actions require a healthy Respond connection.
To access it:
-
Select Respond in the side navigation menu.
-
Select Manage Connections.
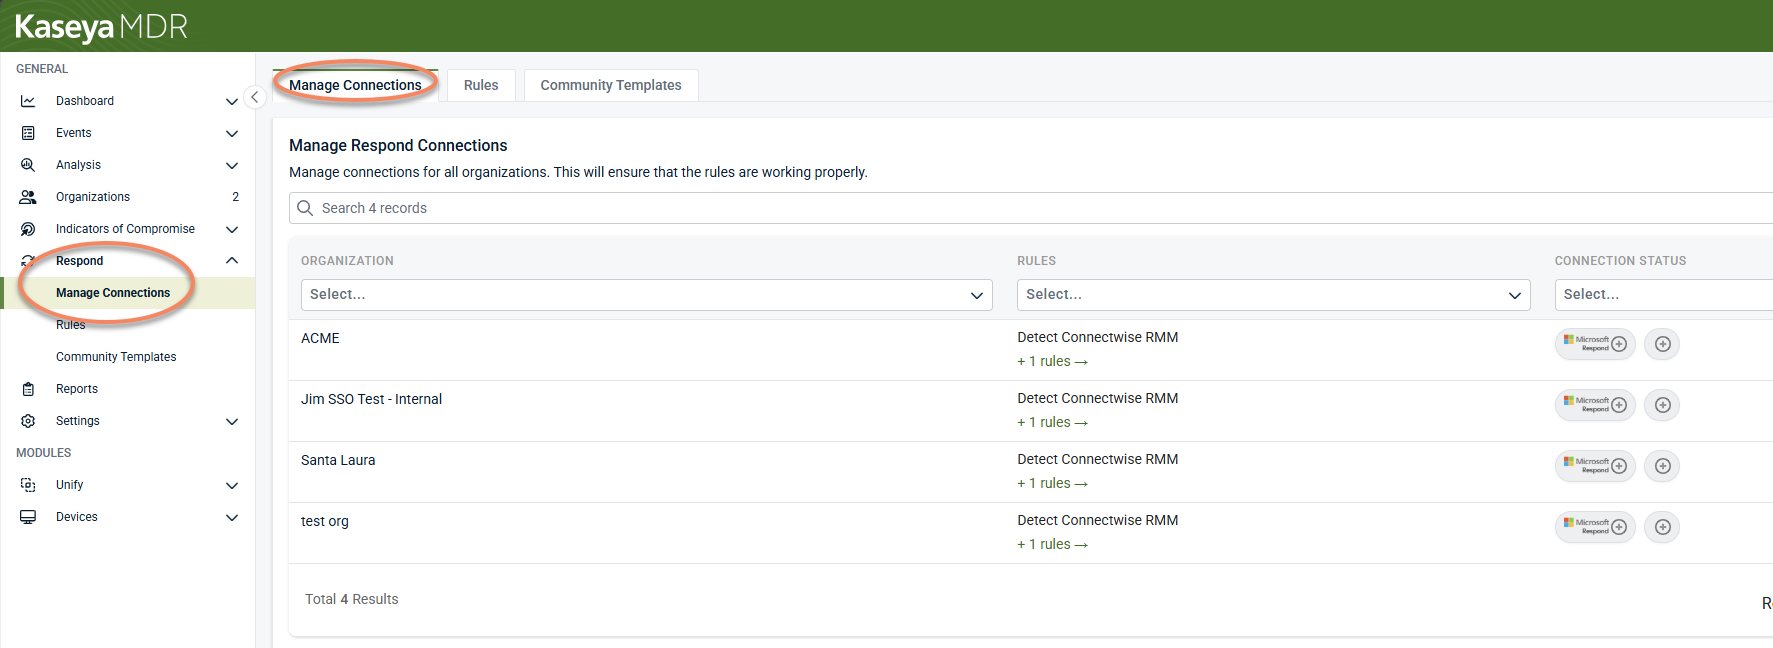
From this page, you can:
-
See which organizations are connected and able to execute Respond actions
-
Identify organizations that are not connected or require attention
-
Start the connection process for an organization when you are ready to enable response actions
Connection status affects response execution only. Respond rules can still evaluate activity and generate alerts when an organization is not connected.
For detailed steps and troubleshooting, see Connecting to Respond and Managing Respond connections.
When to connect organizations to Respond
You should connect organizations to Respond when you are ready to:
-
Enable manual approval workflows
-
Enable automated response actions
Connecting organizations is required only for executing actions. Detection and alerting continue to work without connections.
Respond Rules page
The Rules page is the primary workspace for Respond.
To access it:
-
Select Respond in the side navigation menu.
-
Select Rules.
From this page, you can:
-
View existing Respond rules
-
Create new Respond rules
-
See rule status (active, paused, or draft)
-
Open, duplicate, edit, delete rules, as well as converting them to IOCs
Respond rules define what happens after detection, not how alerts are detected.
Respond rule list actions
From the Respond > Rules list, you can take the following actions on existing Respond rules:
-
Edit (pencil icon): Opens the Respond rule so you can review and modify its trigger, conditions, and response configuration
-
Duplicate (copy icon): Creates a new Respond rule using the selected rule as a starting point
-
Convert to IOC: Creates a new Indicator of Compromise (IOC) rule based on the Respond rule’s detection logic. The resulting IOC rule is created separately and behaves like any other IOC rule.
NOTE Use this option when a Respond rule is better suited to flagging activity for investigation rather than determining escalation or response.
-
Delete: Permanently removes the Respond rule
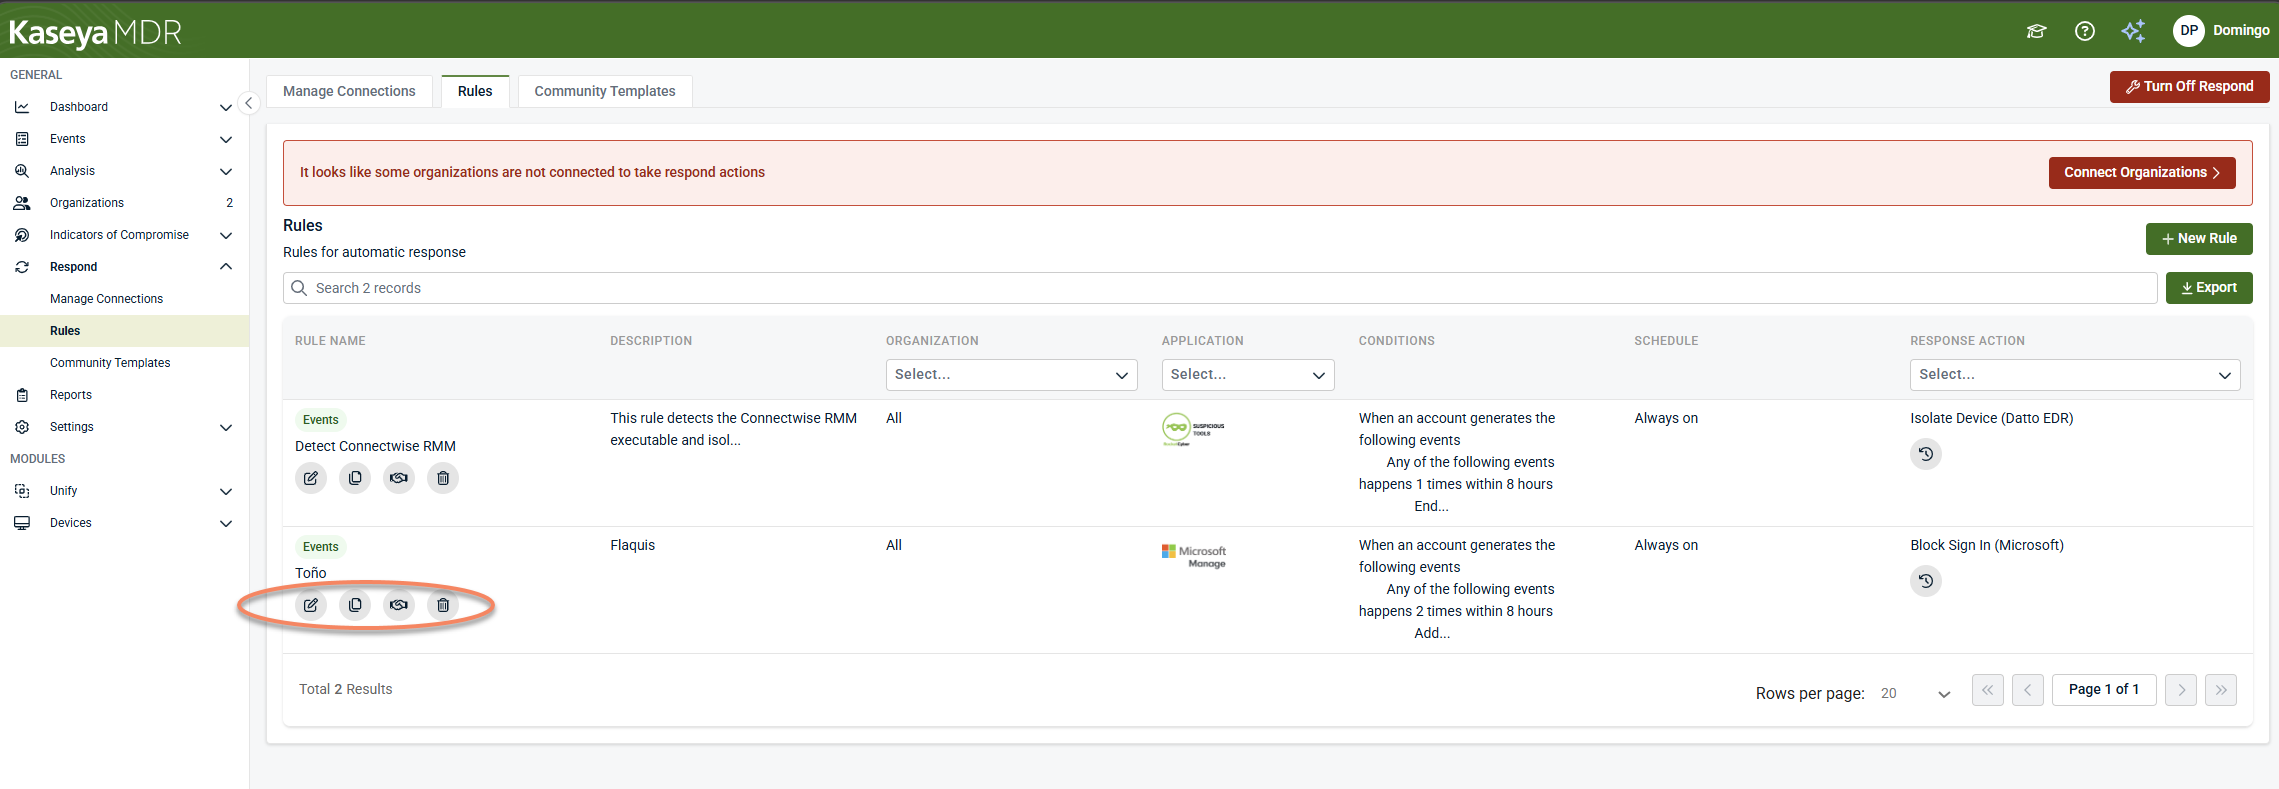
These actions allow you to manage Respond rules directly from the Rules list.
What you can do before connecting organizations
You can begin using Respond before connecting organizations for response actions.
Without connected organizations, you can:
-
Create Respond rules
-
Configure alert-only rules
-
Review Respond rule triggers and generated alerts
-
Validate logic, thresholds, and timing safely
Response actions require organizations to be connected, but alert-only behavior does not.
Respond rule outcomes
Each Respond rule defines one of three outcomes, selected in the rule’s Response section:
-
Alert-only: Generates an alert without taking action
-
Manual approval: Requires a user to approve each trigger before actions run
-
Automatic execution: Runs the selected actions immediately when conditions are met
These outcomes allow you to control escalation gradually, starting with alerts and moving to automation when confidence is high.
High-level Respond rule workflow
This section provides a high-level overview of how Respond rules are typically created and used. Detailed, step-by-step instructions for building Respond rules are covered in Creating Respond rules.
Creating and using Respond rules typically follows this pattern:
-
Open Respond > Rules
-
Select Create Rule
-
Choose the activity the rule evaluates (applications, organizations, accounts).
-
Define conditions, thresholds, and time windows.
-
Select the response outcome (alert-only, approval, or automatic).
-
Save the rule as a draft or activate it.
Review triggered alerts and validate behavior in Analysis.
Respond rules can be edited, paused, duplicated, or refined over time as detection and response are tuned.
Community Templates
The Community Templates section provides pre-built Respond rule templates you can use as starting points.
To use a community template:
-
Go to Respond > Community Templates
-
Locate a template
-
Select View to review the template in a read-only view, or select Duplicate to create a rule from it
-
Confirm creation when promptee
You can create a Respond rule from a template in either of the following ways:
-
Duplicate from the template list: Select the Duplicate icon next to a template and confirm by clicking Create.
-
Duplicate from the template view: Select View, then choose Duplicate, and confirm by clicking Create.
After confirming creation:
-
A new Respond rule is created using the template’s logic
-
A success message appears in the upper-right corner
-
The new rule opens for review and modification
-
The rule behaves like any other Respond rule
-
The rule is not evaluated until it is saved and active
Community templates are not active rules. They are not automatically applied, evaluated, or enforced. Templates exist to accelerate Respond rule creation, not to enforce default behavior.
Key takeaway
Use the Respond module to control how detected activity escalates. Start with alert-only rules, validate behavior through investigation, and connect organizations only when you are ready to enable response actions.
Related articles
-
Creating Respond rules: Walks through how to build Respond rules that correlate multiple signals into higher‑confidence alerts, including rule structure, scope, conditions, schedules, and response outcomes
-
Respond actions: Describes common response actions that may be available when a Respond rule triggers and explains how to use them safely, including when alert‑only behavior is appropriate
-
Managing Respond connections: Explains how Respond connections enable response actions for each organization, how connection status affects execution, and how to identify and resolve broken connections


