Getting started with Kaseya MDR as a SaaS Alerts, Kaseya SIEM, or MDR-only user
This article describes the onboarding experience for accessing Kaseya MDR, including activation, sign-in, and initial access verification.
It applies to users activating Kaseya MDR for the first time, including those who may link MDR to an existing tenant associated with SaaS Alerts and/or Kaseya SIEM.
It helps you:
-
Complete activation and sign in to Kaseya MDR
-
Confirm that your account is correctly associated with your organization
-
Verify that Kaseya MDR is accessible after onboarding
Use this article if:
-
You are activating or signing in to Kaseya MDR for the first time
-
You received Kaseya MDR onboarding or activation communications
-
You are not accessing Kaseya MDR through RocketCyber or a Kaseya 365 subscription
If you are an existing RocketCyber user, see Getting started with Kaseya MDR as a RocketCyber user.
If Kaseya MDR is included in a Kaseya 365 subscription, see Kaseya 365 Endpoint Pro: Getting started with Kaseya MDR.
When the setup flow appears
The onboarding prompts described in this article appear the first time you activate Kaseya MDR using your activation email.
Once setup is complete:
-
You are not prompted to repeat these steps on subsequent logins
-
You access Kaseya MDR directly using your credentials
How onboarding works
During setup, Kaseya MDR guides you through decisions that determine whether it:
-
Links (synchronizes) to an existing Kaseya tenant, or
-
Creates a new, separate tenant for Kaseya MDR
This process supports both:
-
First-time Kaseya users
-
Users who already use SaaS Alerts and/or Kaseya SIEM
The setup flow ensures that Kaseya MDR is correctly associated with your environment and avoids creating duplicate or misaligned tenants.
How KaseyaOne fits into setup
KaseyaOne is the central access and identity platform for Kaseya products, including Kaseya MDR.
Depending on your setup path, you may encounter KaseyaOne during sign-in or account setup.
If your account and authentication have not yet been configured, you will receive a KaseyaOne activation email as part of onboarding. This email is used to set up your credentials and authentication methods. Follow the steps described in Step 6 to complete KaseyaOne account activation.
If you are linking Kaseya MDR to an existing tenant, you typically sign in using that tenant’s authentication flow. In this case, KaseyaOne setup steps do not appear if your account is already configured.
After setup is complete, KaseyaOne can be used to access Kaseya MDR and manage your account.
Before you begin
You will need:
-
Access to the Kaseya MDR activation email
If you plan to link to an existing tenant:
-
Credentials for the tenant you want to link to (for example, SaaS Alerts or Kaseya SIEM)
Depending on your environment, you may receive more than one activation email, such as:
-
A Kaseya MDR activation email
-
A KaseyaOne activation email
These emails are used to establish access to the platform and associated services. The steps in this article guide you through the setup flow regardless of which email you use to begin.
Some linking flows may require permission from an administrator on the existing tenant.
Step 1: Start setup from the activation link
-
Open the product activation email.
-
Select the activation link.
After selecting the link, the setup flow begins.
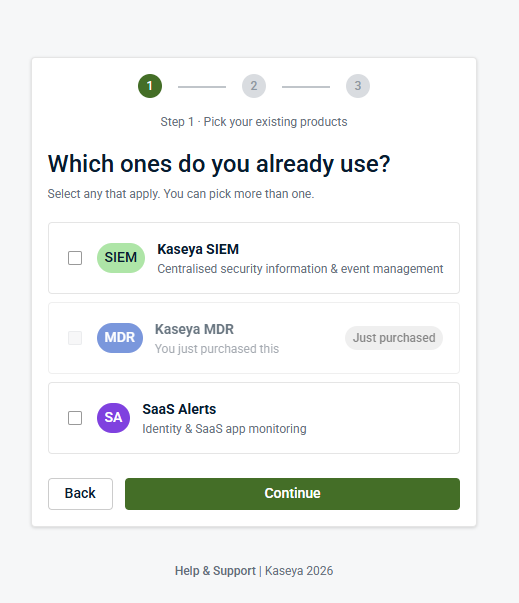
Step 2: Choose whether you already use SaaS Alerts or Kaseya SIEM
A decision screen is displayed asking whether you already use SaaS Alerts or Kaseya SIEM.

Select one of the following:
-
Yes, I have one of these: Select this option if you already use SaaS Alerts, Kaseya SIEM, or both. You will be prompted to identify those products and choose whether to link Kaseya MDR to that existing tenant.
-
No, this is my first Kaseya product: Select this option if you do not already use Kaseya products. You will continue through the setup flow to create a new account and tenant.
Select Continue.
The next steps depend on your selection:
Step 2A: Create your account
If you selected No, this is my first Kaseya product, you are guided through account creation.
-
Select a sign-in method: A screen appears asking you to choose how to create your account.
-
Select one of the available options:
-
Sign up with Google
-
Sign up with Microsoft
-
Sign up with email
-
-
Enter account details: If you select Sign up with email, an account creation form appears.
-
Enter the required information, including:
-
Full name
-
Password
-
Telephone number
Select Create Account to continue.
-
-
Sign in to your account: After your account is created, you are prompted to sign in.
Enter your credentials and select Log in.
After signing in, continue with Step 6 to complete the KaseyaOne account activation.
Step 3 (Yes path): Select which products you already use
If you selected Yes, I have one of these, a product selection screen is displayed.
-
Select the products you already use (SaaS Alerts, Kaseya SIEM, or both).
-
Select Continue.
Step 4 (Yes path): Choose how to configure Kaseya MDR
A configuration screen is displayed.
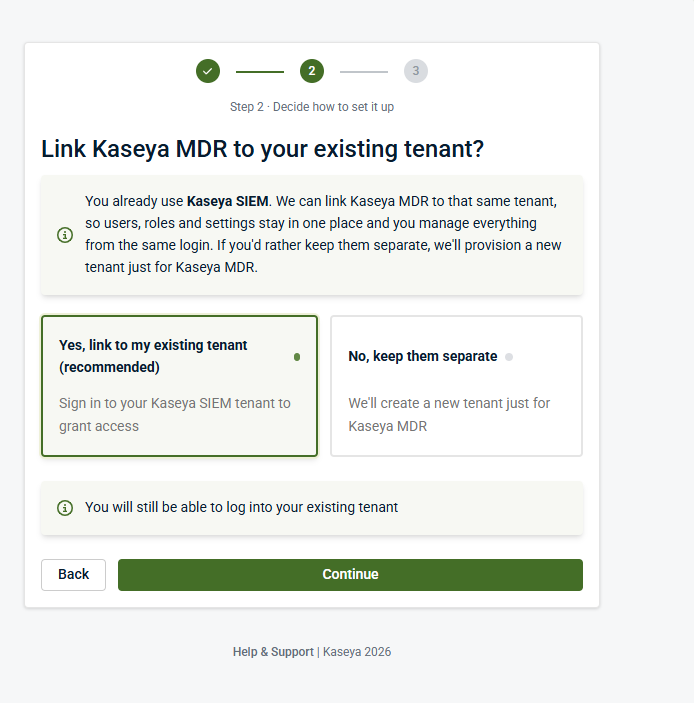
Decide whether to link Kaseya MDR to your existing tenant.
Option A: Yes, link to my existing tenant (recommended)
Select Yes, link to my existing tenant (recommended), then select Continue.
This option links (synchronizes) Kaseya MDR to your existing tenant.
-
If you selected only one product in Step 3, you are directed to that product’s sign-in flow

-
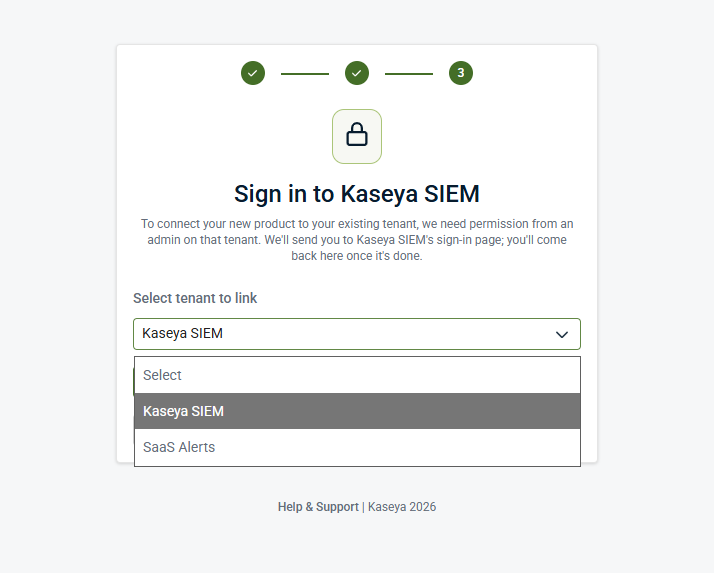
If you selected multiple products, you will see a tenant selection drop-down menu that lets you choose which tenant to link to before you proceed.
Continue with Step 5A.
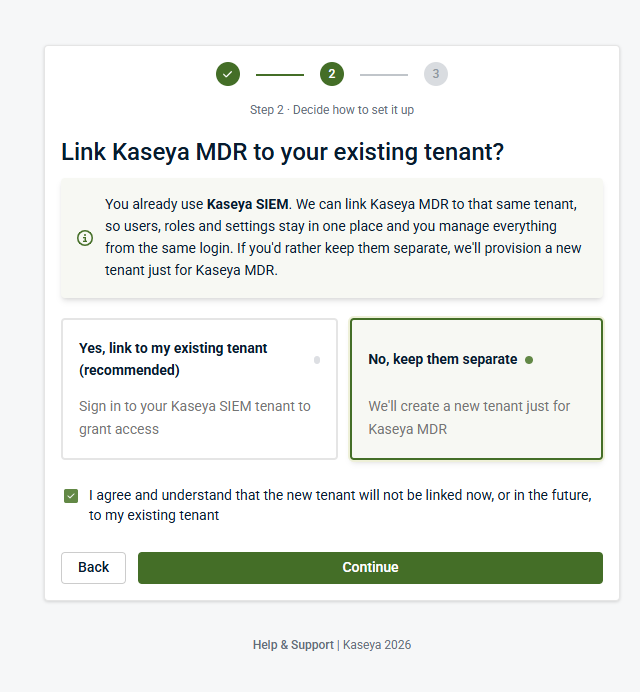
Option B: No, keep them separate (create a new Kaseya MDR tenant)
Select No, keep them separate.
When you choose this option, an acknowledgement checkbox is displayed confirming that the new tenant will not be linked.
-
Select the acknowledgement checkbox.
-
Select Continue to proceed to tenant creation.
The remaining steps depend on your selection:
-
If you chose to link to an existing tenant, continue with Step 5A.
-
If you chose to keep environments separate, continue with Step 5B.
Step 5A (Yes path > link to existing tenant): Sign in and authorize linking
This section describes the experience after selecting Yes, link to my existing tenant.
1. Sign in prompt
A sign-in prompt appears requesting access to your existing tenant.
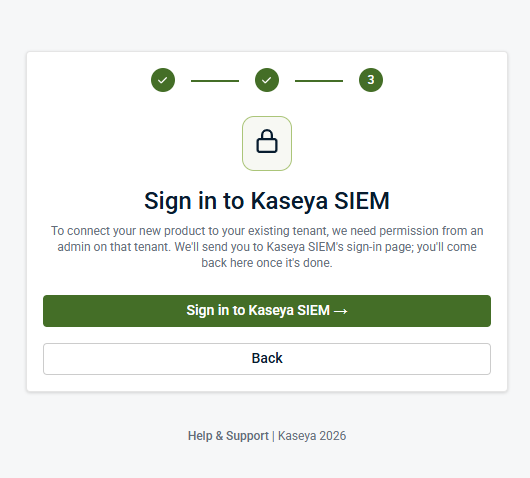
Select Sign in to. . . to continue.
2. Product sign-in page (example: SIEM sign-in)
You are redirected to the product sign-in page.
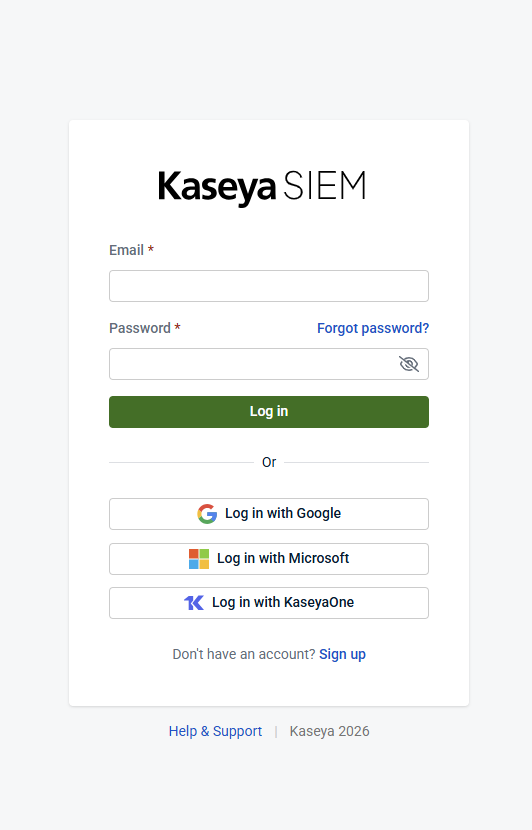
Sign in using one of the available methods (for example, email/password or a supported single sign-on option).
After you sign in successfully, you return to the Kaseya MDR linking flow.
3. Authorize access (example: SaaS Alerts authorization)
A permissions screen will appear requesting access to your existing tenant.
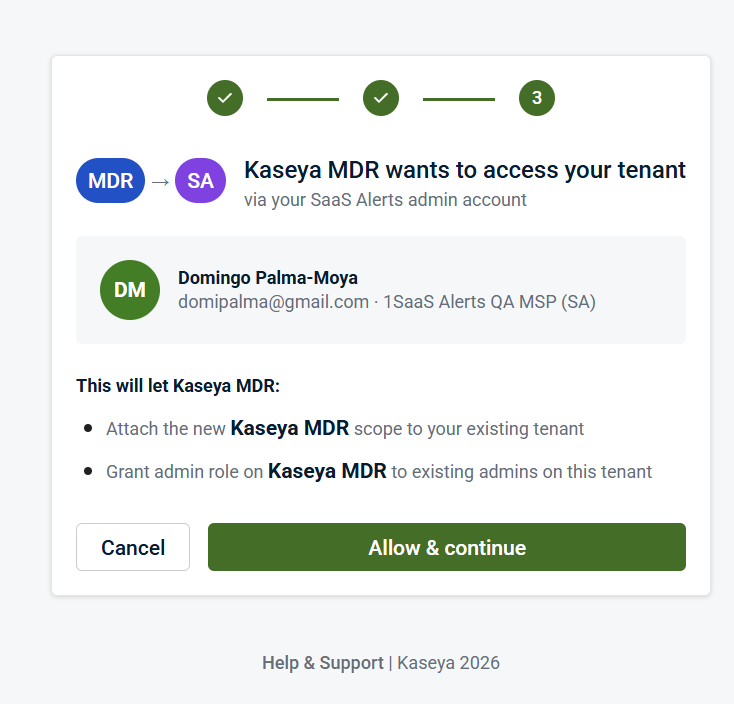
The screen summarizes what Kaseya MDR will be able to do, such as:
-
Attaching Kaseya MDR to your existing tenant
-
Granting admin access to existing administrators
Review the information and select Allow & continue.
After authorization, a progress screen will appear while Kaseya MDR is linked to your tenant. This process completes automatically. No action is required.
4. Linking confirmation
After the linking process completes, a confirmation screen appears.
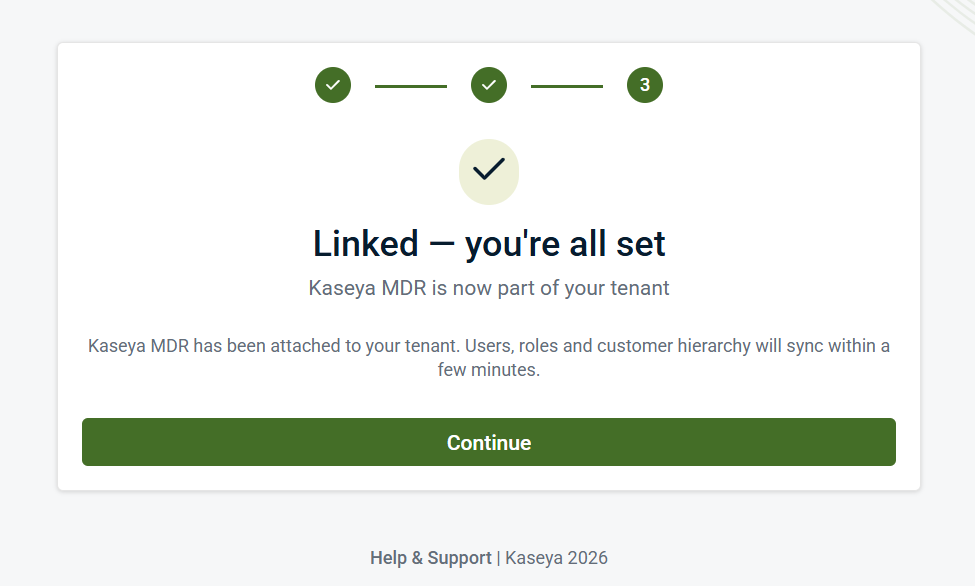
This screen confirms that Kaseya MDR has been linked to your tenant and indicates that users, roles, and structure will sync shortly.
Select Continue.
5. Final summary
A final screen confirms that linking is complete and that data synchronization has started.
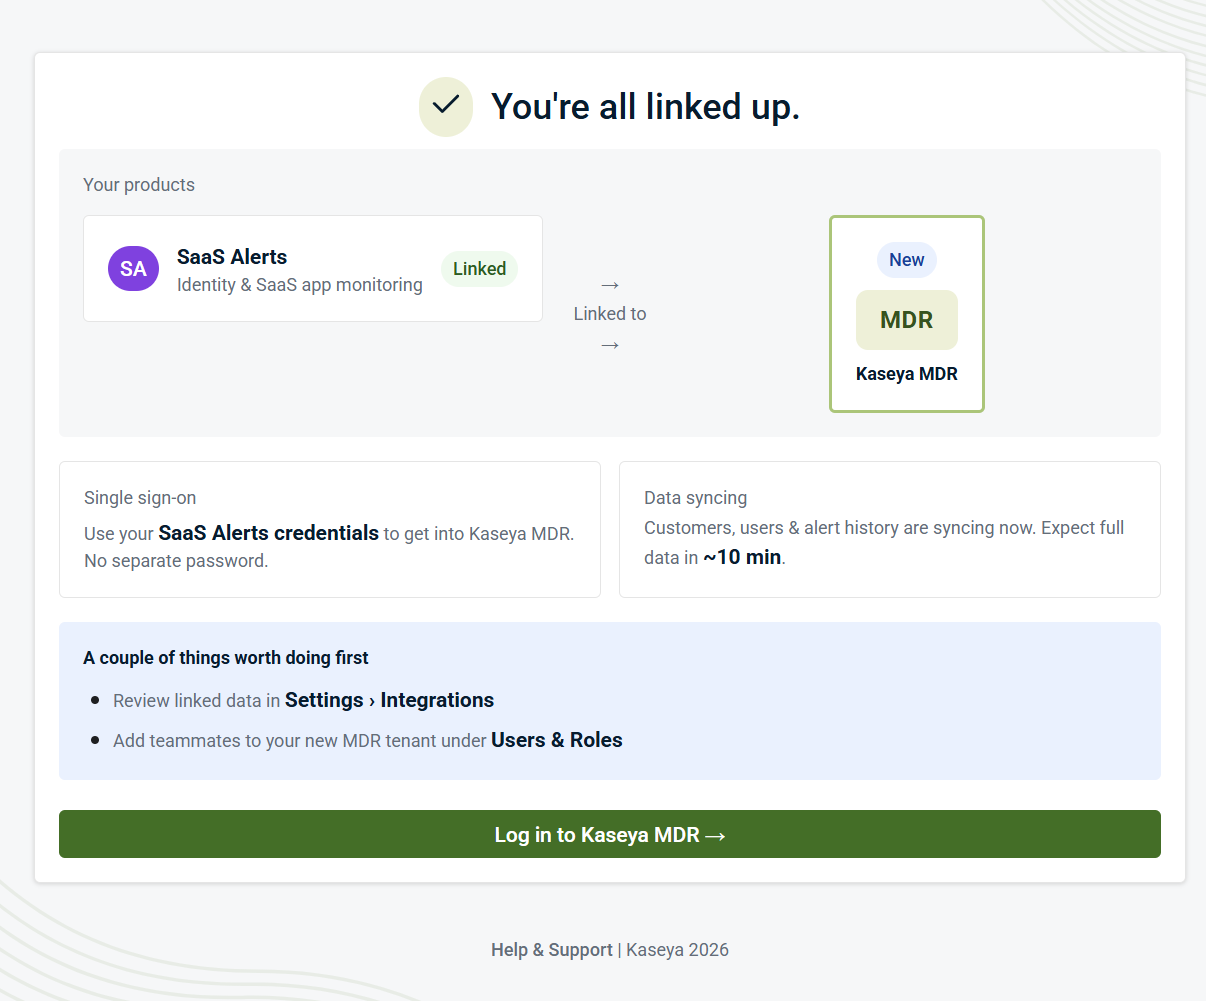
This screen may include notes such as:
-
You can use your existing product credentials to access Kaseya MDR (single sign-on)
-
Users, roles, and other data begin syncing in the background. This process may take a few minutes depending on the environment.
Select Log in to Kaseya MDR.
Step 5B (No path > keep separate): Create a new Kaseya MDR tenant
If you selected No, keep them separate, you are taken to a tenant creation form.
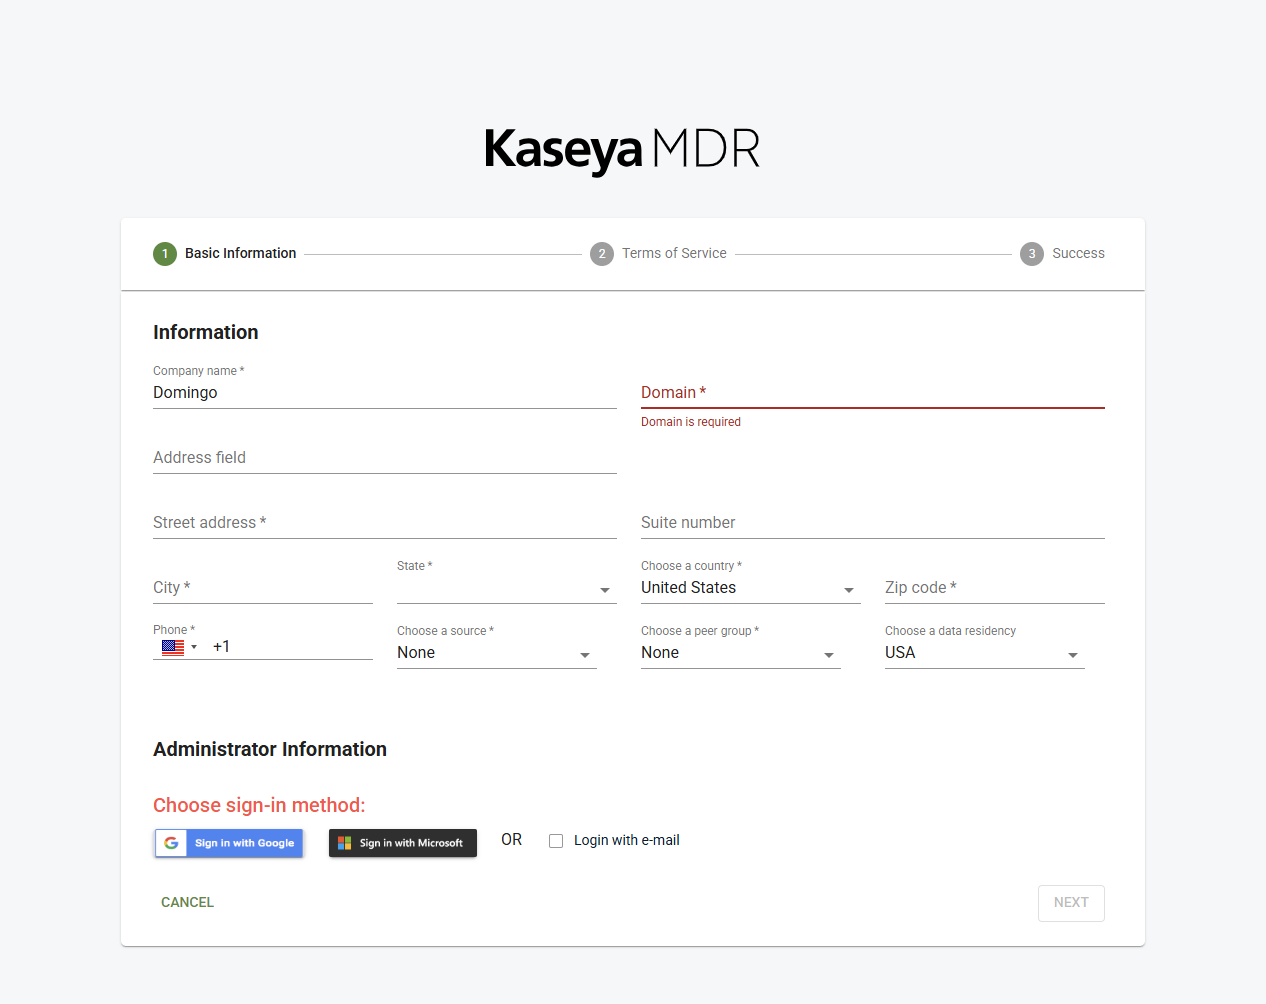
-
In Basic Information, enter required company and domain details (and any required address/location fields shown).
-
In Administrator Information, choose a sign-in method (for example, Google, Microsoft, or email).
-
Select Next and complete the remaining steps (Terms of Service and Success screens).
Step 6: Complete KaseyaOne account activation
KaseyaOne is used to manage authentication and access across Kaseya products. During this step, you complete account security setup, including password creation and multi‑factor authentication (MFA).
-
Account activation: Open the KaseyaOne activation email and select Activate your account.
-
Set your password: After selecting the link, the Set Password screen opens. Enter a password and confirm it using the required fields.
-
Sign in: After setting your password, you are prompted to sign in using your newly created credentials.
-
Set up multi‑factor authentication (MFA):
-
Select Get Started.
-
Scan the QR code using an authentication app.
-
Enter the generated code
-
Select Next.
After completing setup, the system confirms that your authentication method is configured.
You may optionally select Set Up MFA With KaseyaOne App to enable push notifications, or select Skip to continue.
-
-
Review KaseyaOne overview: An onboarding screen introduces KaseyaOne and may describe capabilities such as:
-
Unified login
-
Organization dashboards
-
Support visibility
-
Subscription and billing management
Select Next.
-
-
Choose setup ownership: You are prompted to determine how KaseyaOne setup will be handled:
-
I will set up KaseyaOne myself
-
I need to invite somebody else to set up KaseyaOne
Make your selection and continue.
-
-
Access the dashboard: After onboarding, the KaseyaOne dashboard loads. The dashboard may include:
-
Navigation (Home, Automations, Organizations, Kaseya Store)
-
Setup tasks and configuration options
-
Identity and access configuration cards
-
An insights panel showing setup progress
-
-
Open Kaseya MDR: Scroll to the My Modules section. This section lists the products available to your account, including Kaseya MDR.
Select Kaseya MDR to open it. You will be able to access Kaseya MDR from here if preferred.
NOTE Modules may not appear if permissions are not assigned or Unified Login is not configured.
Step 7: Perform a readiness check
After you sign in, confirm the following:
-
Confirm sign-in: You can access Kaseya MDR without being redirected back to activation.
-
Confirm interface access: Primary navigation and core pages load successfully.
-
Confirm data status: If you linked to an existing tenant:
-
Allow time for synchronization to complete
-
Some data may not appear immediately
If no data is visible, this may be expected depending on connected sources and configuration.
If data sources are already connected, you may see alerts, activity, or investigation context indicating that data is flowing.
-
After your first sign-in, Kaseya MDR displays self-guided onboarding prompts within the product. These prompts help you understand the interface and complete initial setup tasks such as reviewing the dashboard, configuring organizations, and enabling data sources.
Follow the on-screen guidance to continue setup.
Troubleshooting (first-time access)
I clicked the activation link but don’t see the onboarding screens
-
Try opening the link in a private/incognito browser window.
-
Confirm you are using the intended email address for the tenant you want to access.
I chose “Link to my existing tenant” but cannot proceed
The linking flow may require permission from an administrator on the existing tenant.
I selected multiple products and I’m not sure which tenant to choose
Use the tenant selection drop-down menu to select the tenant you want Kaseya MDR linked to.
I created a new tenant by mistake
-
If you selected No, keep them separate, a separate tenant was created.
-
Restart the onboarding flow and choose the linking option if your goal is a single tenant experience.
Key takeaway
Getting started with Kaseya MDR is about confirming three things:
-
You can access the platform successfully.
-
You either linked (synchronized) to an existing tenant or created a new tenant intentionally.
-
Kaseya MDR is ready for use at a basic level (including synchronization progress, if applicable).
Related articles
-
Unified Login with KaseyaOne: Explains how Unified Login affects authentication, MFA enforcement, and sign‑in behavior when accessing Kaseya MDR through KaseyaOne
-
Securing your account with two‑factor authentication (2FA): Shows how to enable and manage 2FA for Kaseya MDR and explains how authentication requirements affect response and automation capabilities
-
Managing organizations: Explains how organizations are created, scoped, and managed in Kaseya MDR once access is established in a standalone environment
-
Connecting data sources and integrations: Describes how to connect endpoints, SaaS applications, and other data sources so telemetry can begin flowing into Kaseya MDR
-
How Kaseya MDR works: Introduces the core mental models behind alerts, investigations, and response so you understand how the platform behaves before day‑to‑day use
-
Using Kaseya MDR: Provides guidance for reviewing alerts, investigating activity, managing signal and noise, and using response capabilities once onboarding is complete.


