Integration: Kaseya MDR and Syncro
 Security and navigation
Kaseya MDR
NAVIGATION Settings > PSA and Email
PERMISSIONS Ability to configure integrations and manage API credentials
Syncro
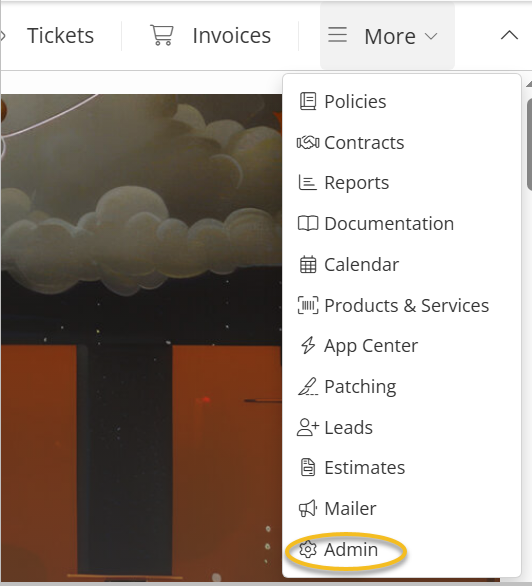
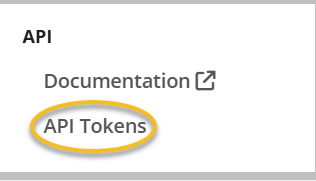
NAVIGATION More > Admin > API Tokens
PERMISSIONS Ability to create API tokens with custom permissions
The Syncro RMM and PSA integration connects Syncro (a combined RMM and PSA platform) to SaaS Alerts and maps Syncro accounts to SaaS Alerts organizations. The data provided through this connection is used by Unify to support organization mapping and device visibility. This integration does not generate event alerts.
Prerequisites
-
Active Syncro RMM and/or PSA instance
-
Ability to create API tokens in Syncro
-
A SaaS Alerts instance available within Kaseya MDR
How to...
Create an API token in Syncro
To create an API token, complete the following steps:
-
Expand the More menu and click Admin.
-
Under API, click API Tokens.
-
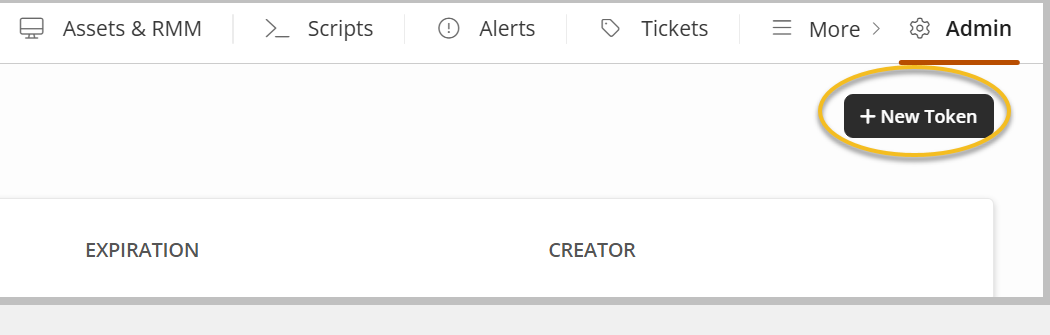
Click + New Token.
-
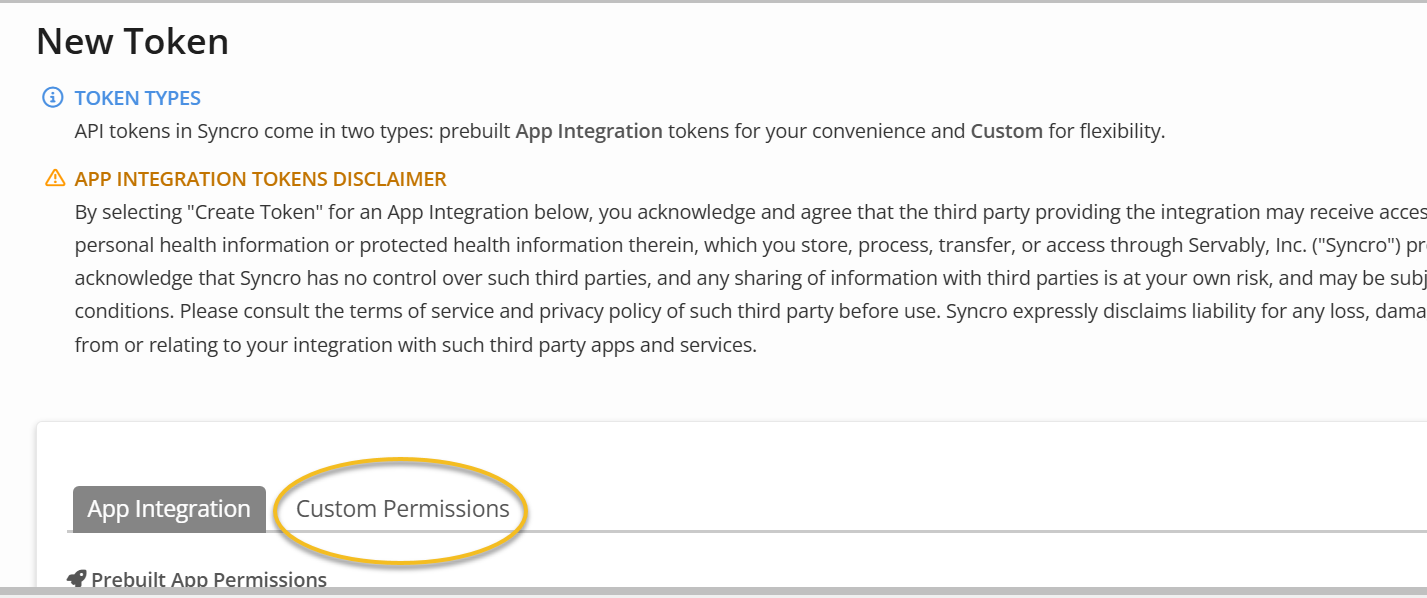
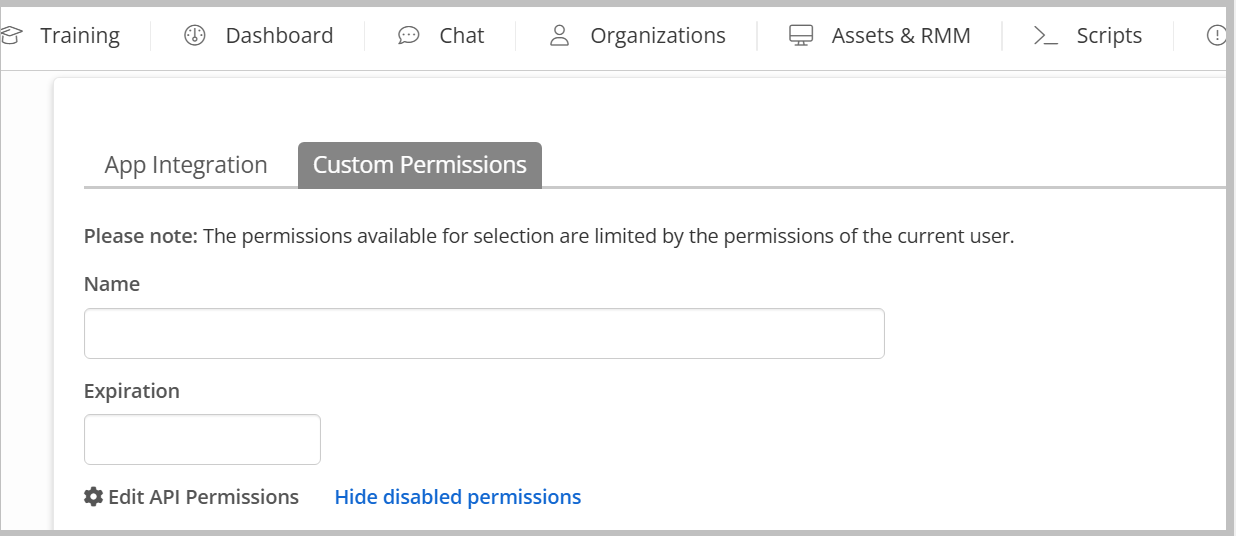
Select Custom Permissions.
-
Provide a name and expiration date.
-
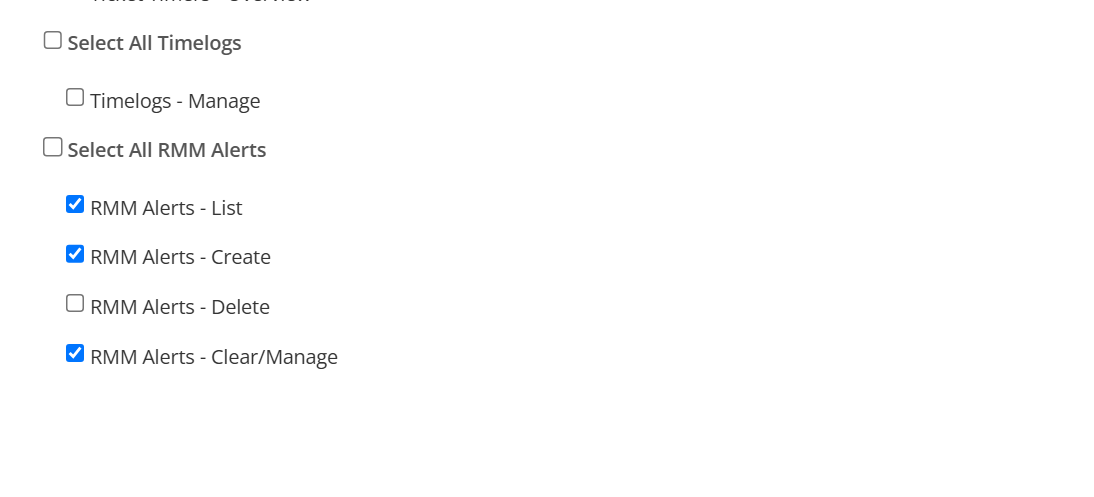
Assign permissions as needed. Recommended permissions include:
-
Assets - View Details
-
Assets - List/Search
-
Contacts - Import
-
Customers - List/Search
-
Customers - View Detail
-
Customers - View Total Invoiced
-
Products - List/Search
-
Products - View Cost
-
Line Item - Edit Prices
-
Line Item - View Cost
-
Line Item - Add Manual Item for Invoices/Estimates
-
Tickets - List/Search
-
Tickets - View Details
-
Tickets - Create
-
Tickets - Edit
-
Ticket Comments - New
-
Recurring Invoices - List
-
Recurring Invoices - Edit
-
RMM Alerts - List
-
RMM Alerts - Create
-
RMM Alerts - Clear/Manage
-
-
Click Create API Token.
-
Copy the token, store it securely, and click Done.
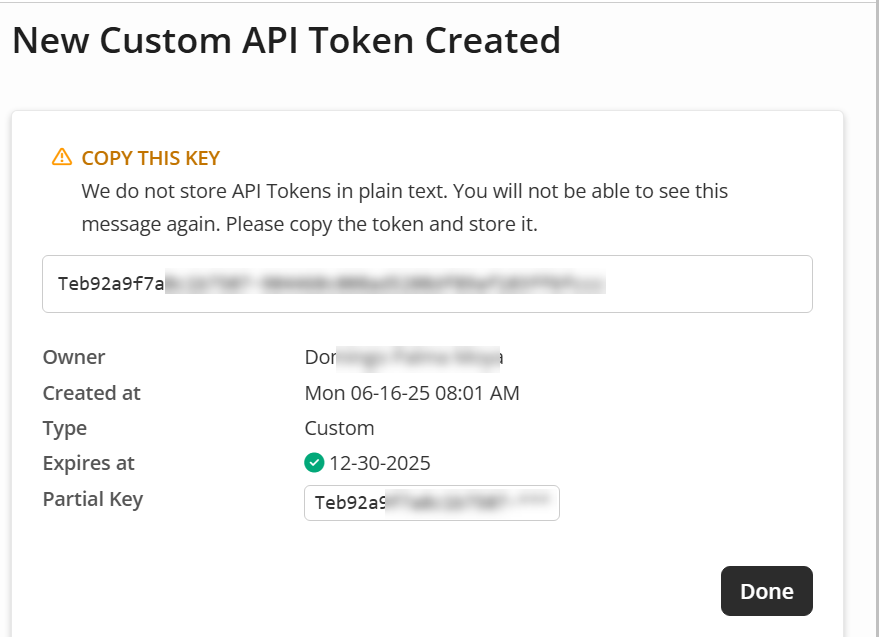
Outcome: The API token is available for use in the Kaseya MDR connection wizard.
To set up Microsoft Entra ID for enhanced Unify functionality, refer to Information on Microsoft Entra Device ID. For information on configuring Unify functionality in SaaS Alerts, refer to Unify overview.
Set up the integration in Kaseya MDR
To enable the integration, complete the following steps:
-
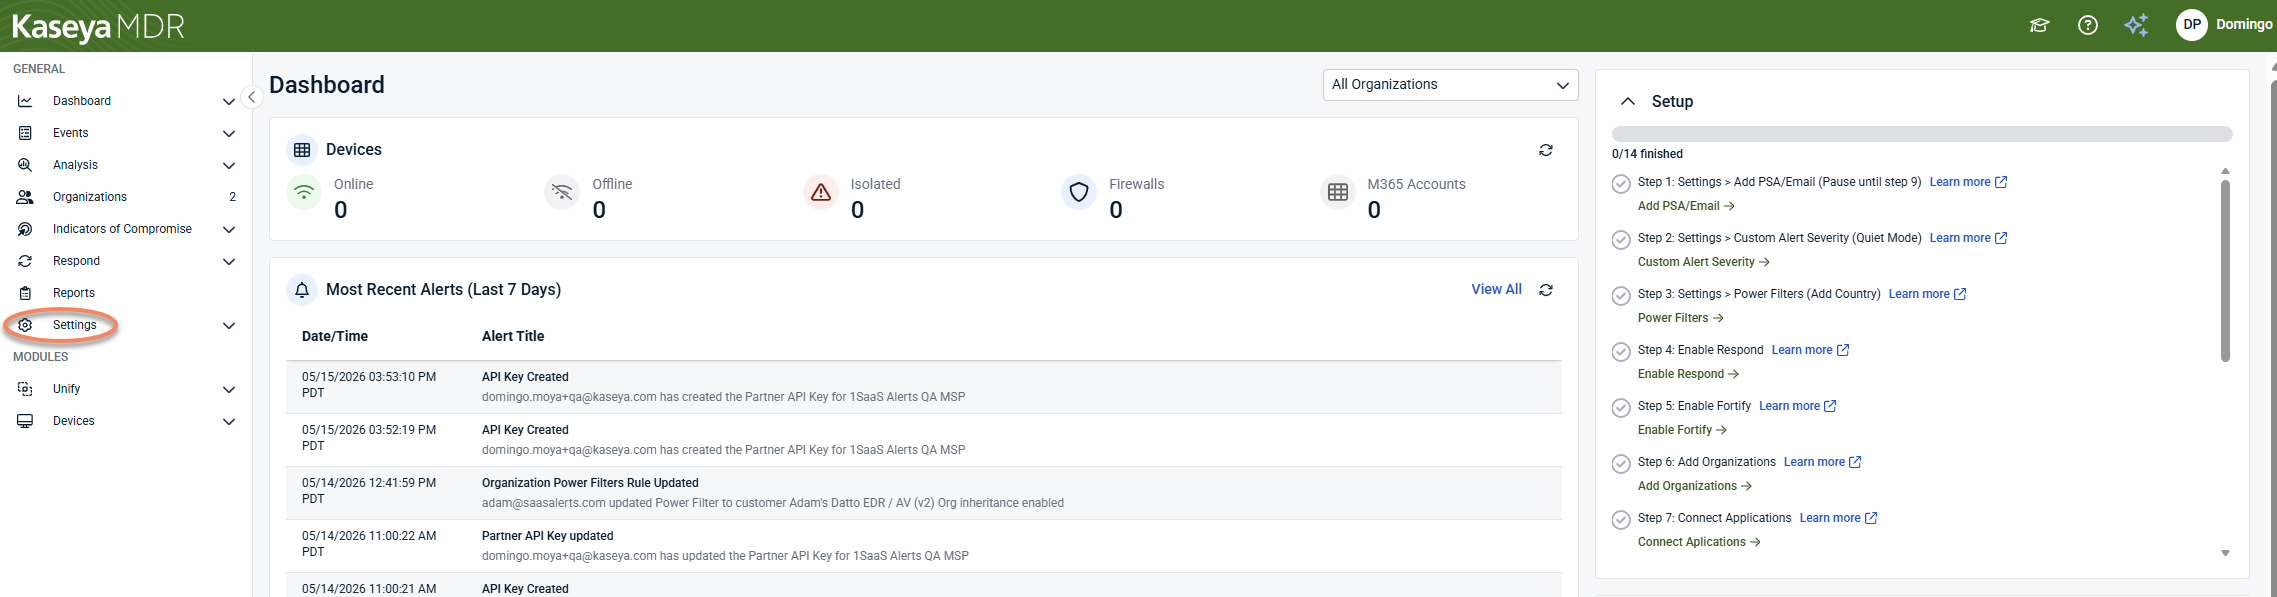
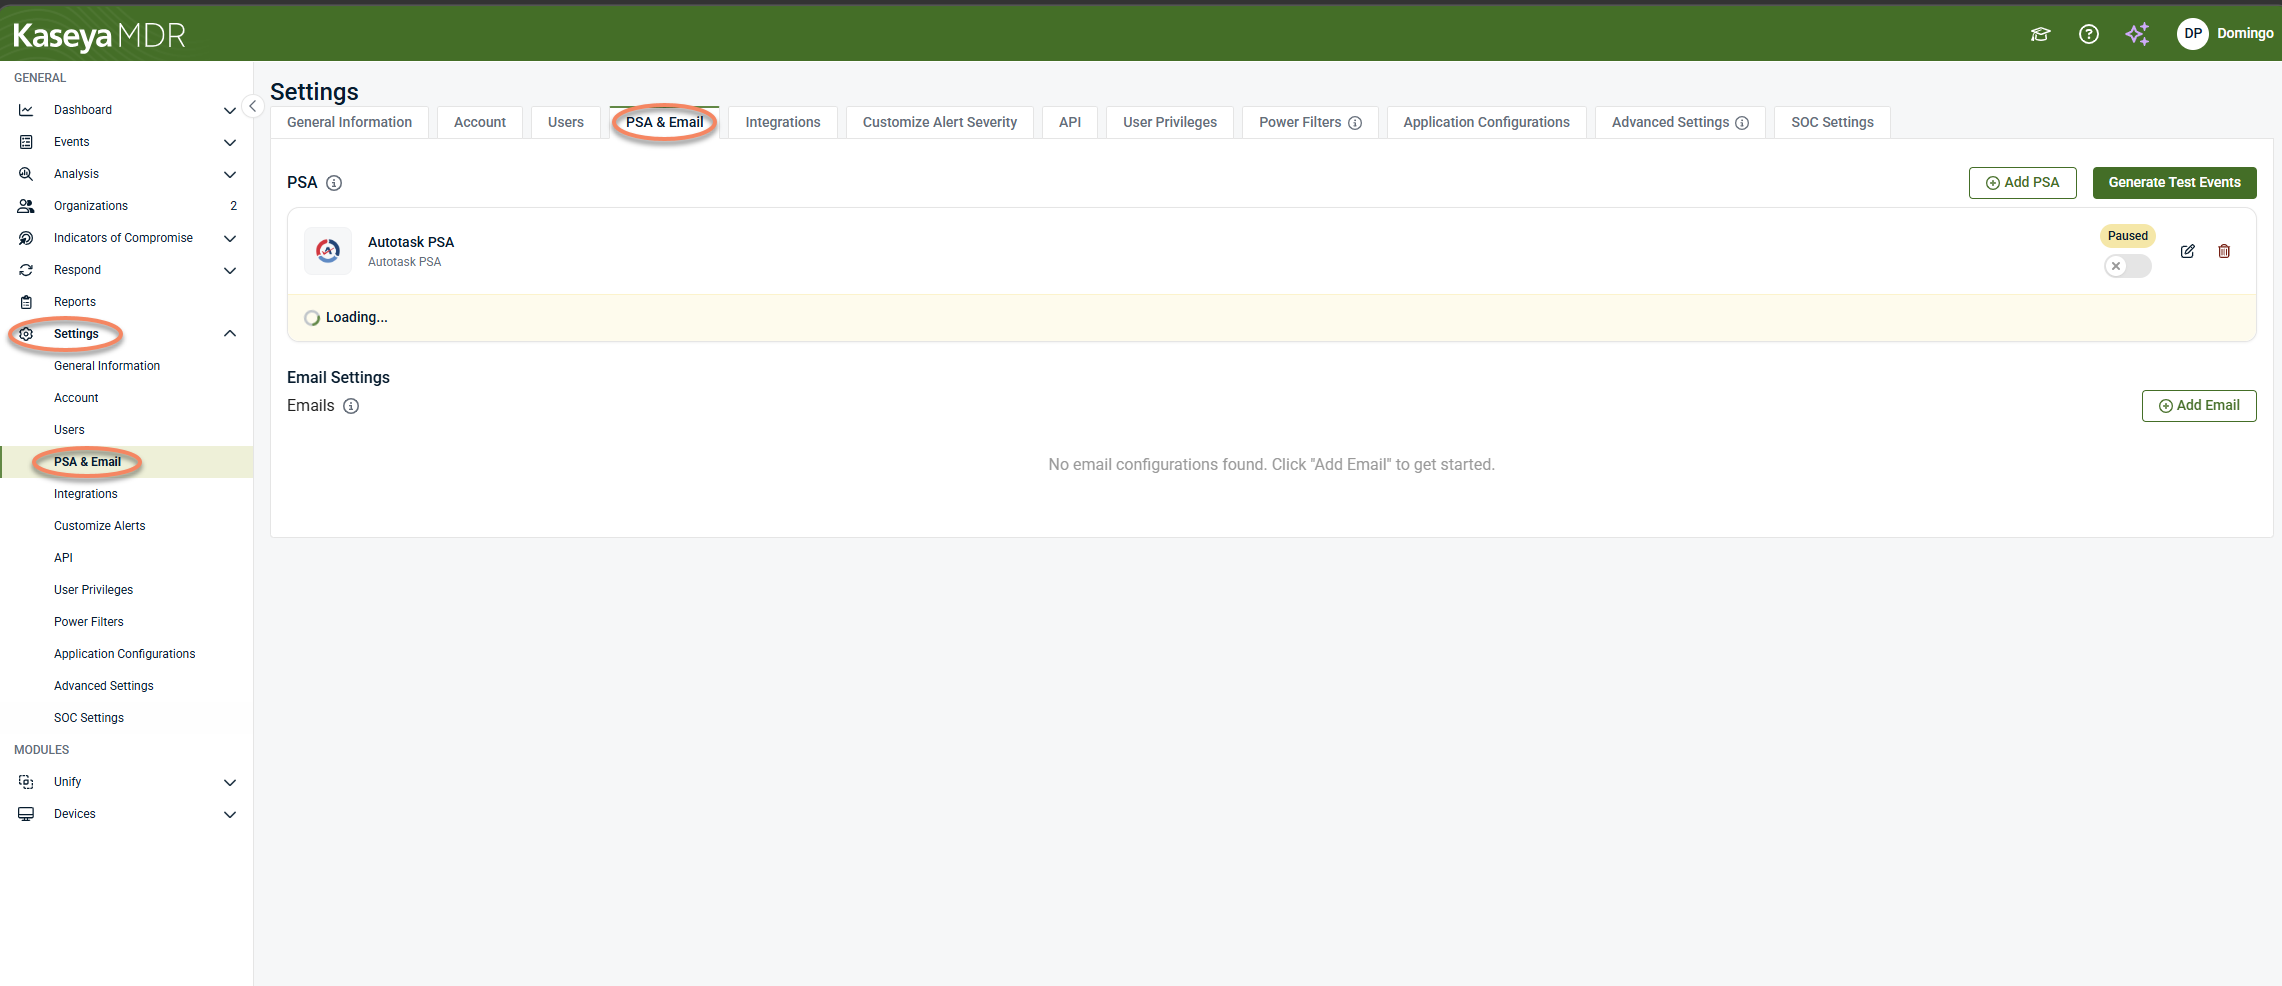
From the side navigation menu, click Settings.
-
Select PSA and Email.
-
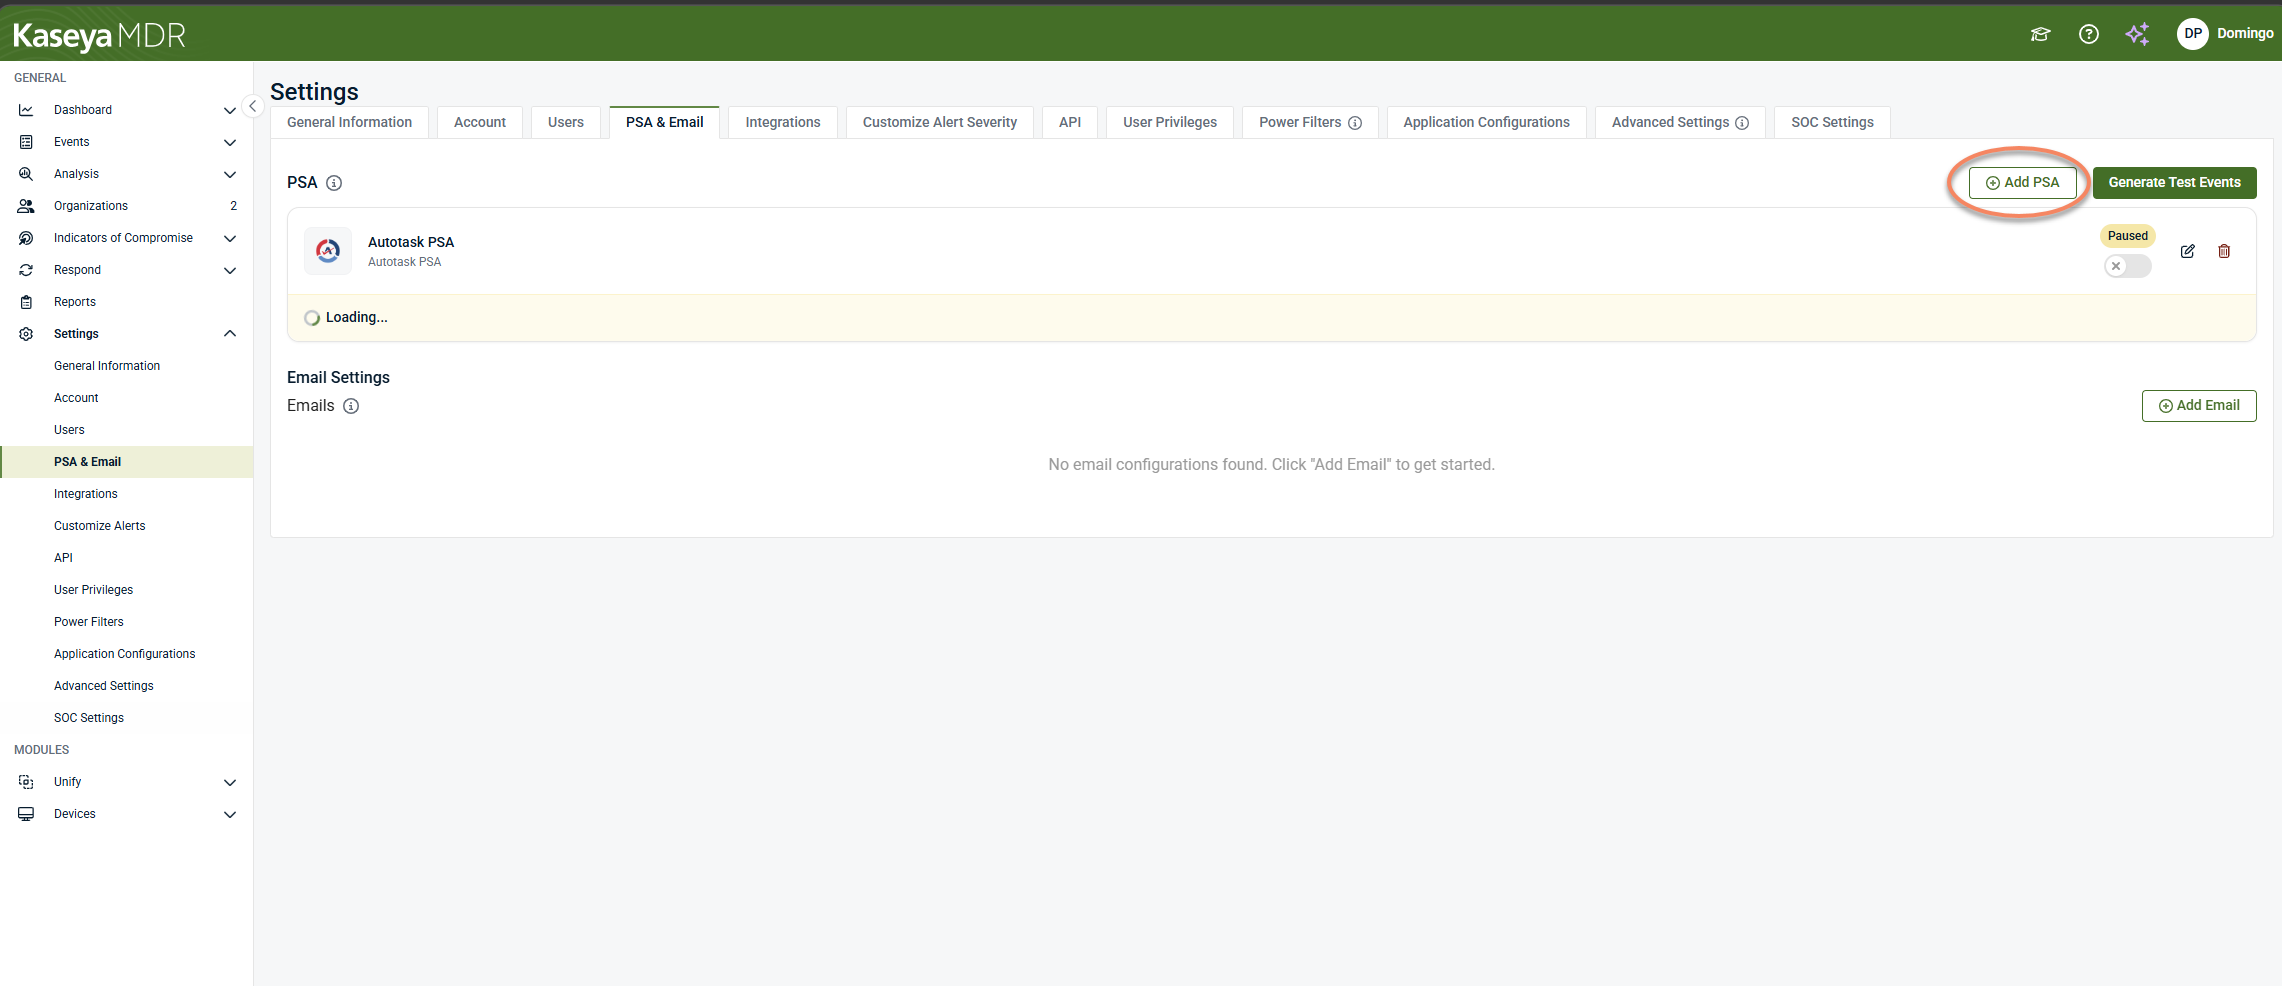
Click + Add PSA.
-
Select Syncro.
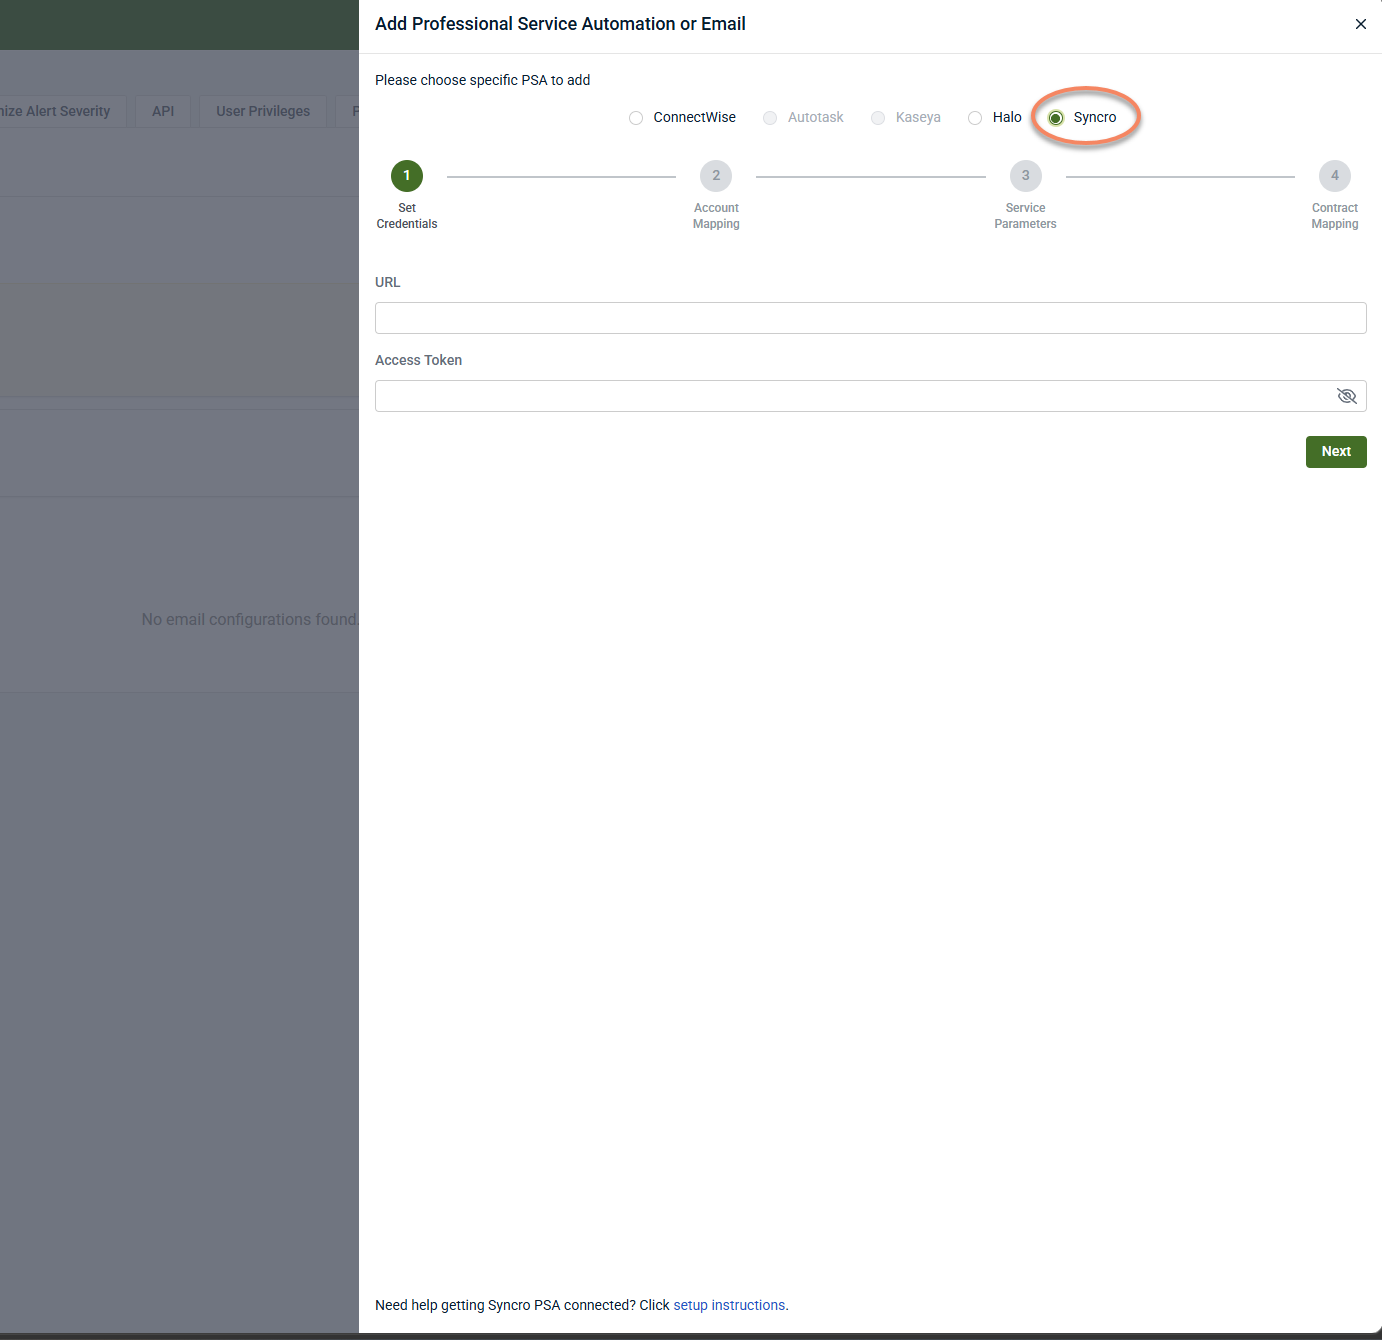
Connection wizard in Kaseya MDR
Step 1: Set credentials
-
Enter the Syncro URL and API token created earlier.
-
Click Next.
-
If credentials are valid, the wizard proceeds to account mapping.
Outcome: Connection to Syncro is established.
Step 2: Organization mapping
After the Syncro credentials are validated, the wizard moves to Account Mapping.
This step is required. The integration cannot be completed until a default PSA account is selected and organization mappings are defined.
Account default (required)
Select a Catch‑All PSA Account. This account is used when a specific Kaseya MDR organization does not have an explicit mapping.
When Attach Contacts to Tickets on Creation is enabled:
-
The selected PSA account must have at least one contact.
-
Kaseya MDR attempts to match a PSA contact using the email address included in the alert.
-
If a matching contact is found, it is attached to the ticket.
-
If no matching contact is found, the ticket uses the default contact for the mapped PSA account.
-
If no contact exists, the wizard displays a validation message and prevents you from continuing.
When Attach Contacts to Tickets on Creation is disabled:
-
Tickets are created without associating a contact.
-
The wizard allows you to proceed even if the PSA account has no contacts.
Mapping PSA accounts to organizations
Use the mapping table to associate Kaseya BMS accounts with Kaseya MDR organizations.
You can:
-
Filter PSA accounts by account type, classification, or market segment
-
Map individual PSA accounts to the appropriate MDR organization
-
Assign a specific contact per mapped account (optional)
-
Ignore PSA accounts that should not be available for mapping
Only mapped organizations will route tickets to their corresponding PSA accounts. Unmapped organizations fall back to the catch‑all account.
After completing the required mappings, select Next to continue the wizard.
For conceptual details on how organization mapping works and why it is required, see Connecting data sources and integrations.
Step 3: Ticket parameters
In this step, you define the default ticket properties used when Kaseya MDR creates Kaseya BMS tickets, along with optional overrides for specific alert types or rules.
Several fields in this step are required. The wizard will not allow you to continue until mandatory defaults are set.
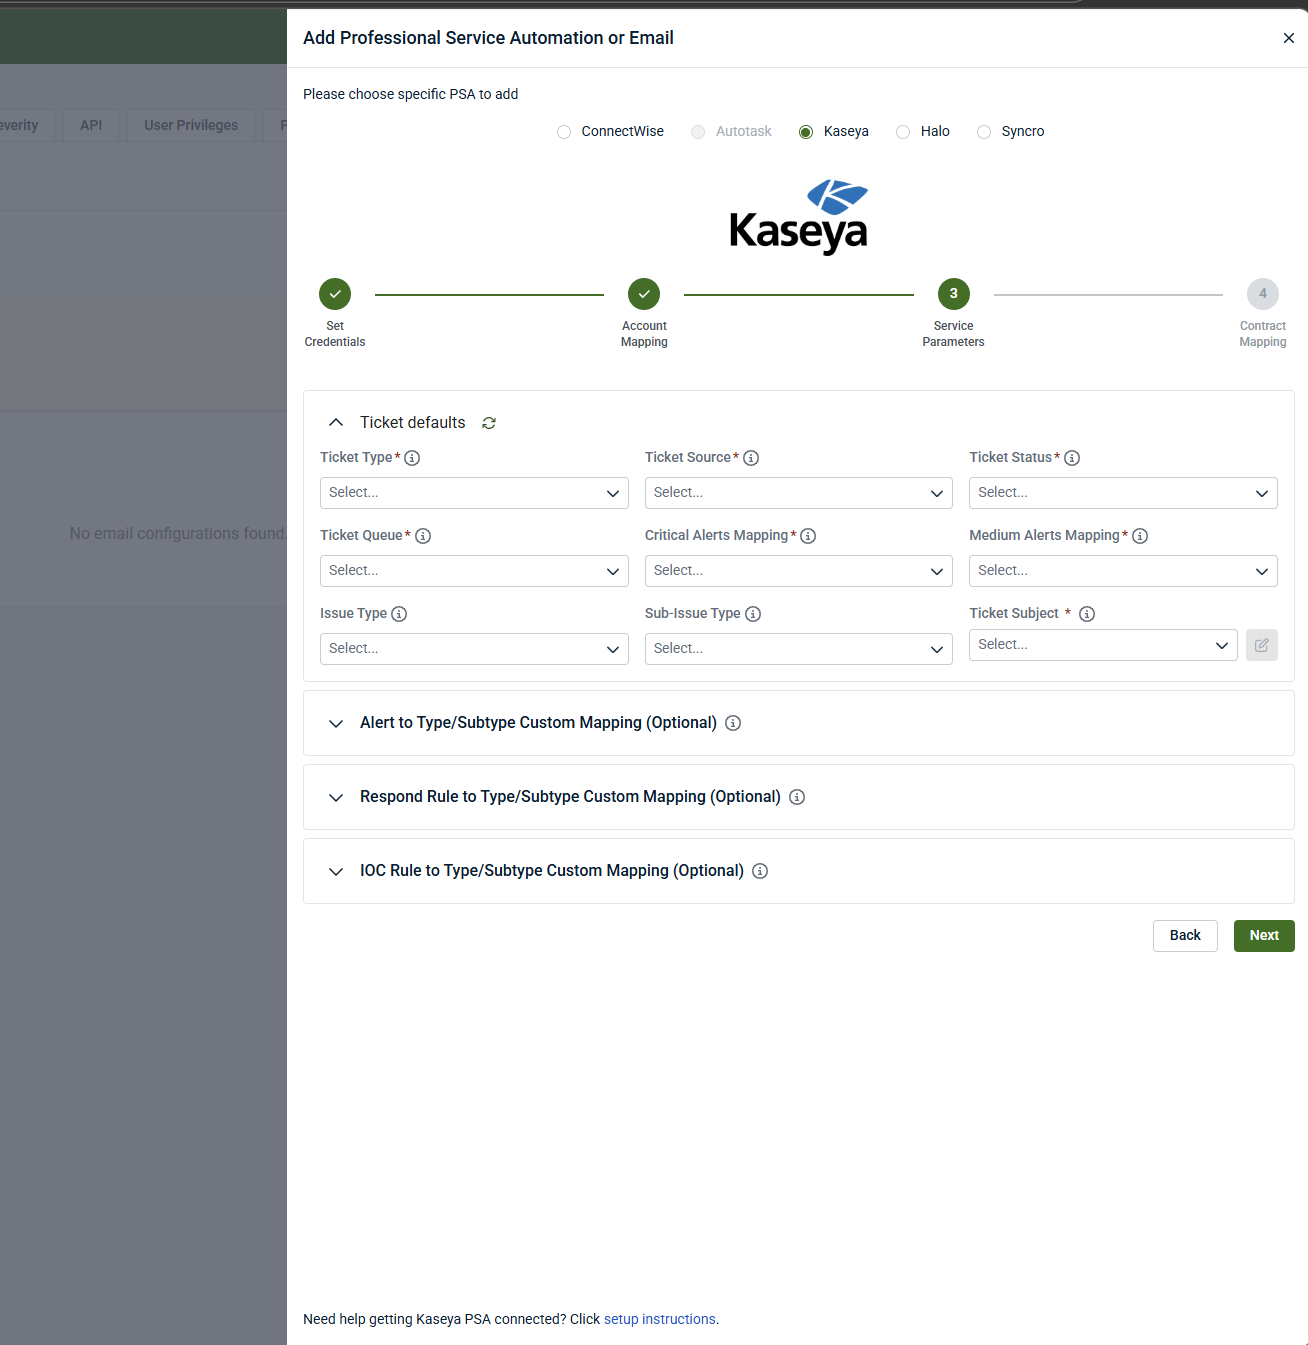
Ticket defaults (required)
Ticket defaults define how all new tickets generated from Kaseya MDR are created in Kaseya BMS unless overridden later in this step.
You must configure the following:
-
Ticket Category: The category applied to all new tickets.
-
Ticket Type: The Kaseya BMS ticket type used for new tickets.
-
Ticket Status: The initial status assigned to new tickets.
-
Ticket Queue: The service queue where new tickets are placed.
-
Ticket Source: The source value assigned to tickets created by Kaseya MDR.
-
Ticket Subject: The subject format used for ticket creation and ticket grouping.
-
Alert Priority Mapping: How Kaseya MDR alert severities (for example, Critical and Medium) map to Kaseya BMS ticket priorities.
These defaults apply globally unless a custom mapping is configured below.
Ticket subject and grouping behavior
The Ticket Subject determines both:
-
The subject line of newly created tickets
-
How subsequent alerts are grouped as notes or activities on existing tickets
Choose a subject format that aligns with how you want related alerts grouped within Kaseya BMS.
Note defaults (required)
When Kaseya MDR adds notes to an existing Kaseya BMS ticket, these settings control how the note is created.
You must configure:
-
Note Type: The Kaseya BMS note type used when adding notes
-
Note Visibility: Who can see notes added by Kaseya MDR
-
Note Title: The title format used for notes
These settings are required even if alerts are grouped into existing tickets.
Custom Issue Type and Sub‑Issue mappings (optional)
You can optionally override the default Issue Type and Sub‑Issue Type for specific cases.
Separate mapping sections are available for:
-
Alert‑based mappings: Override values based on specific Kaseya MDR event types
-
Respond Rule mappings: Override values for alerts generated by specific Respond Rules
-
IOC Rule mappings: Override values for alerts generated by specific IOC rules
When a custom mapping is configured and matches, the custom Issue Type / Sub‑Issue Type is used.
Otherwise, the global defaults defined above are applied.
Leaving these sections empty uses the global defaults for all tickets.
Completion criteria
You can proceed to the next step once:
-
All required ticket defaults are configured
-
Required note defaults are set
-
Any optional custom mappings are either completed or intentionally left blank
Step 4: Contract mapping (optional)
This step controls how Kaseya BMS agreements/contracts are associated with tickets created by Kaseya MDR and, optionally, how billable user counts are synchronized.
Contract mapping is optional. If no contract functionality is enabled, you can finish the wizard without configuring this step.
Agreement / contract functionality
Use these toggles to enable contract‑related behavior:
-
Add Agreements / Contracts to Tickets: When enabled, the selected Kaseya BMS agreement or contract is added to each ticket created for the organization.
-
Sync Billable Users to Contracts / Agreements: When enabled, billable user counts from Kaseya MDR are synchronized to the mapped Kaseya BMS agreement on a scheduled basis.
-
User Sync Day: Specifies the day of the month when billable user counts are synchronized to Kaseya BMS.
Enabling billable user synchronization does not affect alert creation or investigation behavior. It only updates contract quantities in Kaseya BMS.
Contract defaults (conditional)
If Sync Billable Users to Contracts / Agreements is enabled, a Default Contract Service is required.
-
The default contract service is used when user counts are synchronized and no organization‑specific service override is defined.
-
If no default service is selected while synchronization is enabled, the wizard displays a validation message and prevents completion.
If billable user synchronization is disabled, the default contract service is not required.
Contract mapping by organization
Use the Contract Mapping table to associate Kaseya BMS contracts with Kaseya MDR organizations.
-
For each organization, you can:
-
Select the Kaseya BMS contract to associate with tickets
-
Choose whether the default contract service should be added to that contract
-
Optionally review or override cost and price values (if applicable)
Organizations without a mapped contract will:
-
Still generate tickets (if ticket creation is enabled)
-
Not receive contract association or user count updates
Completion criteria
You can finish the wizard when one of the following is true:
-
Contract functionality is disabled, and no defaults are required
-
or
-
Required toggles are enabled and all mandatory fields (such as Default Contract Service) are configured
Contract mapping affects ticket enrichment and billing alignment only.
It does not:
-
Change alert detection
-
Modify alert severity
-
Affect investigations or SOC workflows
When the integration is completed successfully, Kaseya BMS appears as Active in Settings > PSA & Email, and a confirmation message is shown in the upper‑right corner of the interface.
Disable the integration in Kaseya MDR
To disable the integration, complete the following steps:
-
From the side navigation menu, click Settings.
-
Select PSA and Email.
-
Locate the Syncro integration.
-
Do one of the following:
-
To temporarily stop ticket creation, use the toggle to pause the integration.
-
To permanently remove the integration, click the delete (trash) icon and confirm the removal.
-


